Quick start guide
Quick start guide for Invicti Enterprise
This document outlines the steps to get started with Invicti Enterprise. For demonstration purposes, we will use one of Invicti’s test websites. Scanning this site will help you understand its features and capabilities.
You will learn how to do the following tasks:
- Step 1: Add a target website
- Step 2: Launch a scan
- Step 3: Review scan results
- Step 4: Integrate with an issue tracking tool
- Step 5: Create a scan report
Prerequisites for the Invicti Enterprise On-Premises
This guide applies to Invicti Enterprise On-Demand. To use it with Invicti Enterprise On-Premises, you need to install a scan agent and an authentication verifier agent, as well as configure your email settings. These components are essential for scanning your web application, verifying login forms, and receiving scan reports.
Step 1: Add a target website
Before scanning, you have to add a website to your Invicti Enterprise account.
- Select Targets > New Target from the left-side menu.
- Enter the necessary information, such as name, URL, and technical contact.
- Click Save.
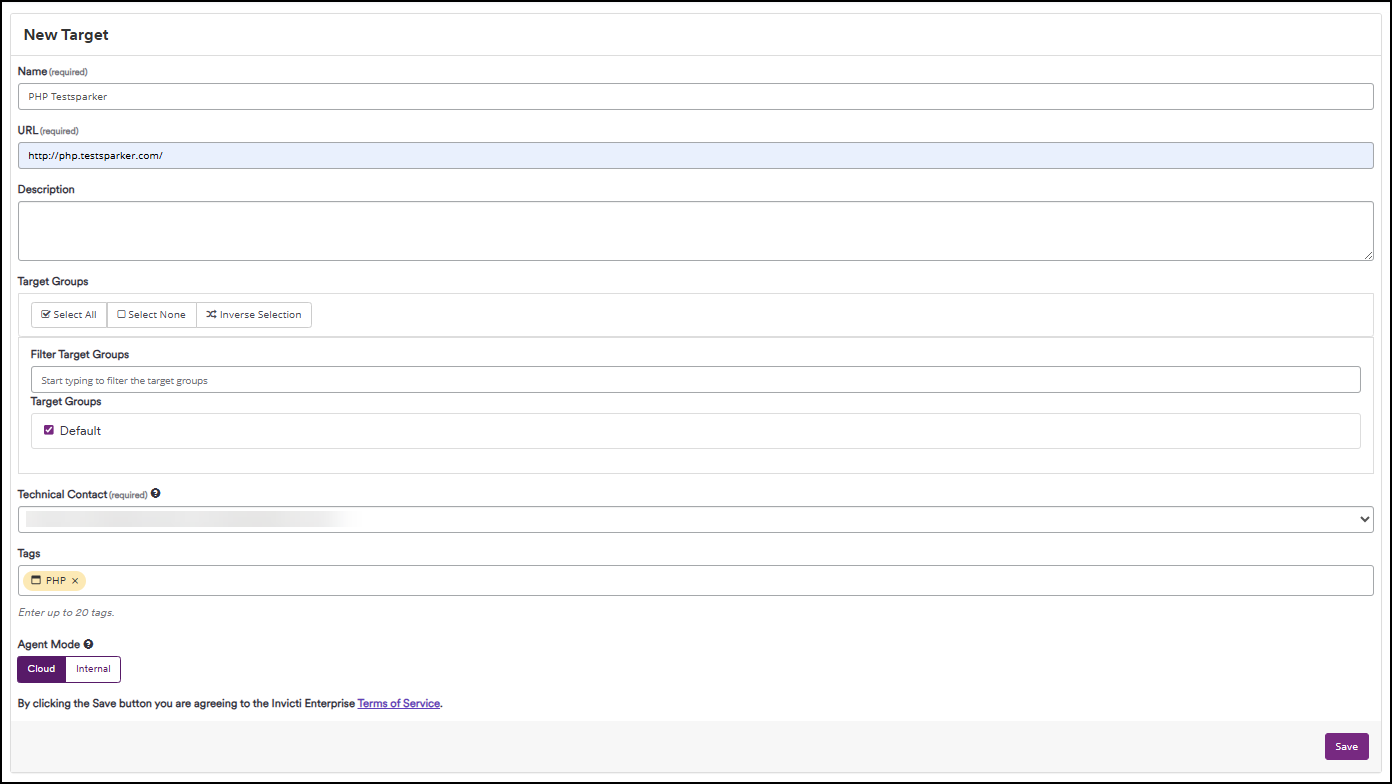
NOTE: Select the Cloud mode when the website is accessible publicly from the internet. Select the Internal mode and install an agent to scan a website in your internal network. For information on using agents with the On-Premises edition, refer to the Installing the Invicti Enterprise Agent document. |

For detailed information on adding a website, refer to the Adding a Target in Invicti Enterprise document.
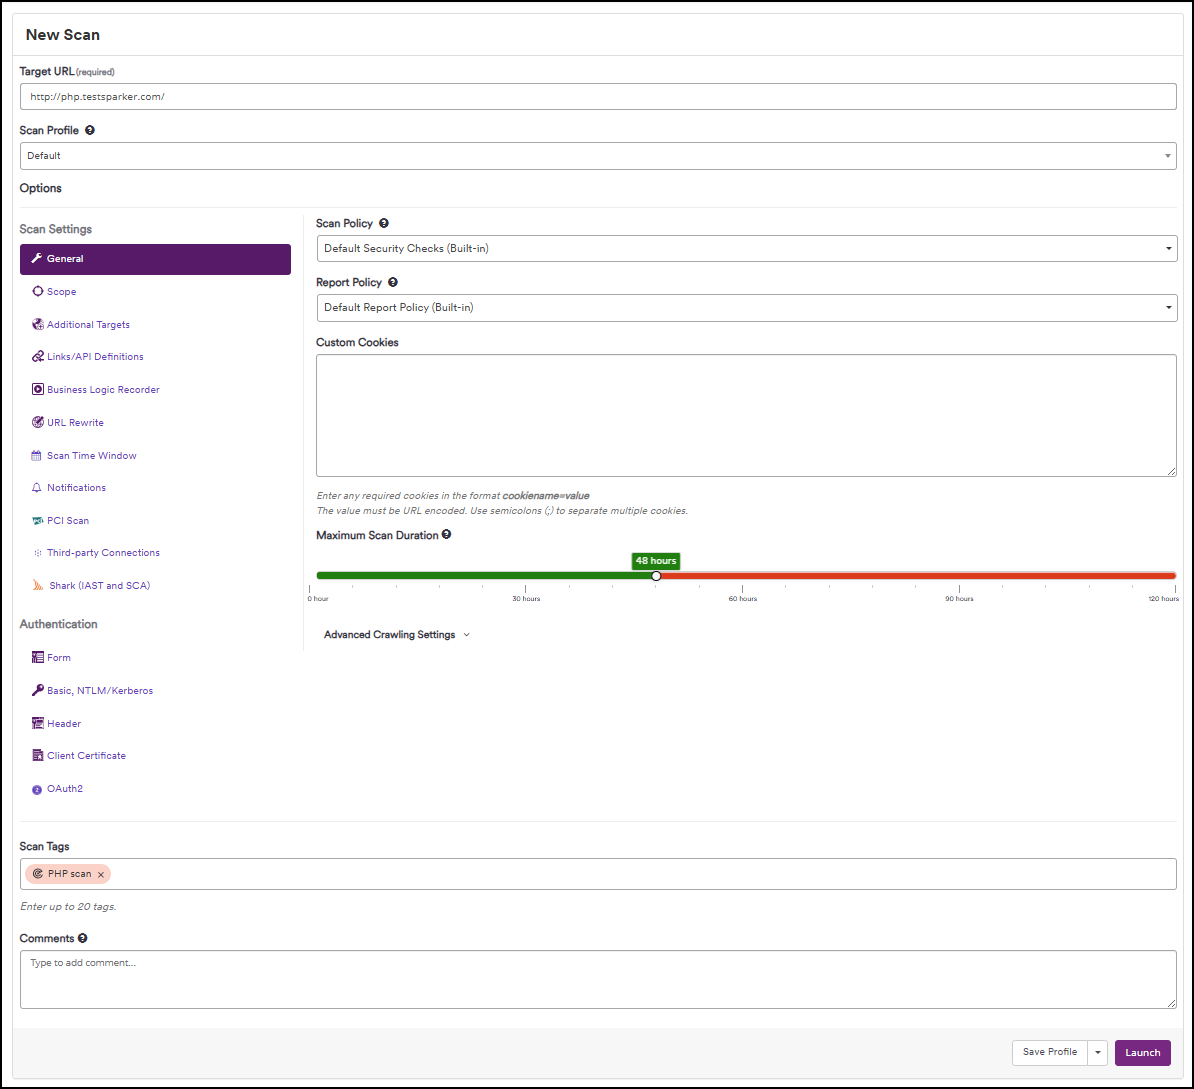
Step 2: Launch a scan
To launch a website scan, you can use the default settings or customize the scan options, depending on your needs.
TIP: The scan duration varies depending on the size of the web application and the security checks enabled in the selected Scan Policy. |

Option A: Using default settings
The default configuration includes Default Scan Policy with built-in Security Checks, Report Policy, Maximum Scan Duration, Scan Scope, Heuristic URL Rewrite Mode, and Notifications. It allows you to start scanning quickly.
- Select Scans > New Scan from the left-side menu to open a scan configuration.
- In the Target URL input your previously saved website.
- Click Launch to start the scan with the default settings.
- A scan summary will open, allowing you to monitor the progress in real-time.
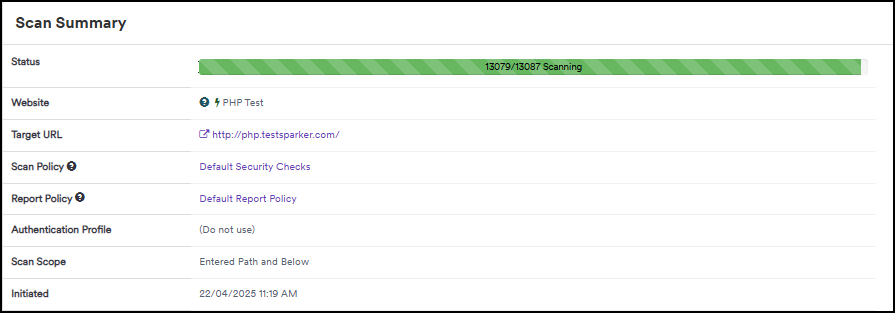
- The scanner reports the vulnerabilities as soon as it identifies them.

To understand the scan settings in-depth, refer to our Create a new scan document.
Option B: Using customized settings
Invicti Enterprise has extensive customization options. In this section we will show the most commonly amended options.
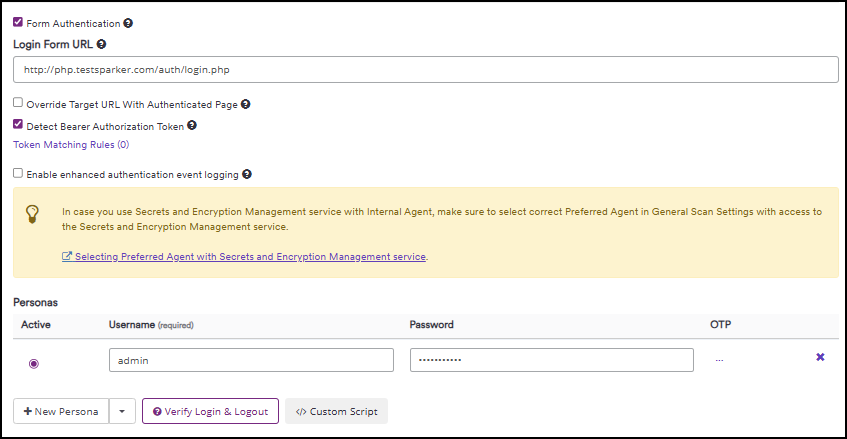
Form Authentication
Enter authentication information so that the scanner can crawl and attack password-protected web pages.
- Select Scan > New Scan from the left-side menu.
- In the Authentication section select Form > Form Authentication.
- Enter the login credentials.
- Click Verify Login & Logout to make sure that the scanner can crawl these web pages.
- Click Launch to start the scan.
If your own website has a different configuration for authentication, refer to the Authentication overview document.
Scan Scope
By configuring the Scan Scope you can define the parts of the website to be scanned.
- Select the scope between Entered Path and Below, Only Entered URL, and Whole Domain.
- Exclude a certain part of the website from the security scanning by using regular expressions (RegEx).
- Enable the Exclude Authentication Pages checkbox to remove pages such as login and logout from the scan scope.
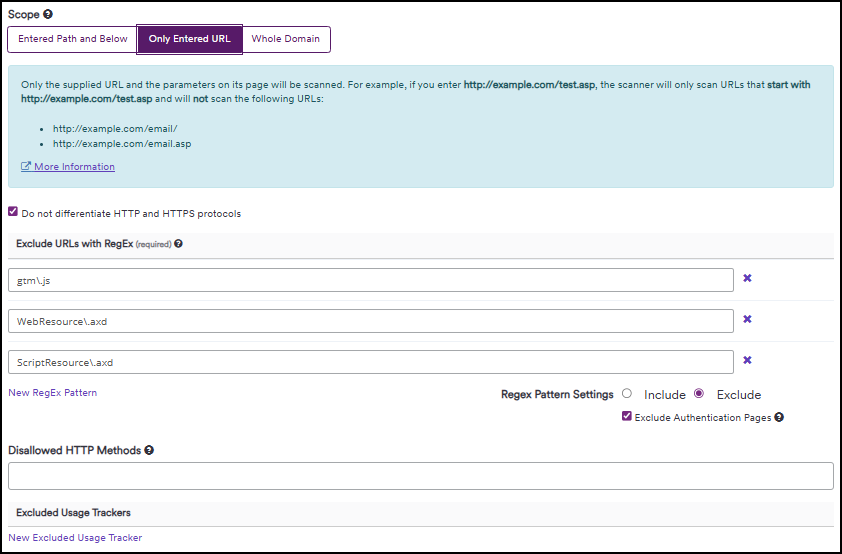
For more information, refer to the Scan Scope document.
Scan Time Window
Configure the scan time window to control when a scan will take place. To prevent disruptions on live, visitor-accessible production websites, carefully consider the scan time.
- Select Scan > New Scan from the left-side menu.
- In Scan Settings > Scan Time Window enable the Enable Scan Time Window checkbox to set up the allowed time frame.
TIP: For further information on scanning live environments, refer to the Scanning Production Environments document. |

Other Options
In addition to these customizations, you may add links to have a head start in scanning and configuring notifications.
To understand each setting and how to configure it, refer to our Invicti Enterprise scan options fields document.
Step 3: Review scan results
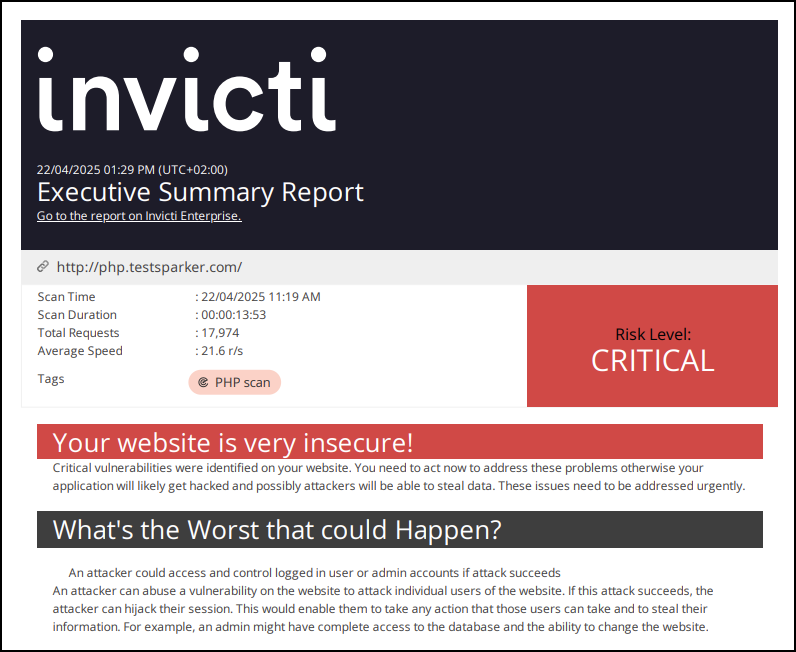
When Invicti Enterprise completes the security scanning, it notifies you with an email. In this example, the scanner warns you that the PHP test website is very insecure and requires immediate attention.
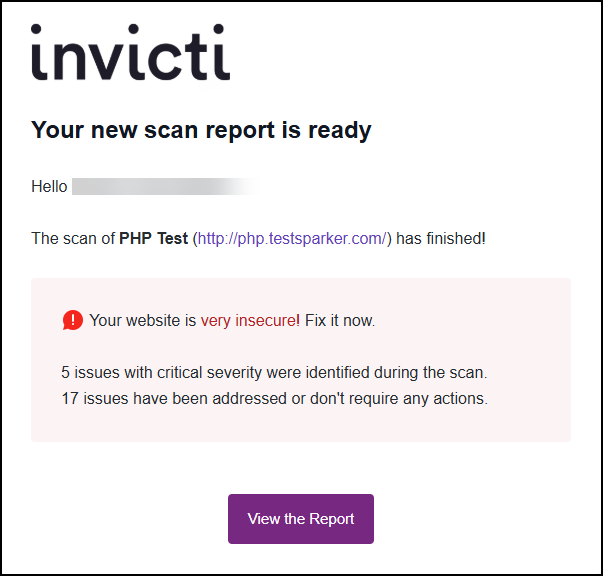
- Click View the Report to open the scan summary. This page lists vulnerabilities grouped by severity levels.
- Review the technical report to check if the identified vulnerability is confirmed.

- To assign this vulnerability to developers, click Update. Invicti Enterprise automatically notifies them so they can start working on this issue. Click the Accepted Risk button if you prefer not to work on it.
- To review the progress, select Issues > All Issues from the left-side menu. This page provides you a quick overview of vulnerabilities and their statuses.
- The Fixed (Unconfirmed) status means remediation action has been taken on this issue, but it’s not confirmed yet as Fixed.
- Select Issues > Waiting for Retest from the left-side menu. Invicti Enterprise notifies you about the retest scan and when it completes the scan.
- Select Scans > Recent Scans to see the scan’s status.
- If the issue is fixed, its state will be automatically changed to Fixed (Confirmed). Otherwise, the status is back to Present again and will assign it to the user who marked the issue previously as Fixed.
NOTE: To create a team in Invicti Enterprise refer to the Managing Team Members in Invicti Enterprise document. |
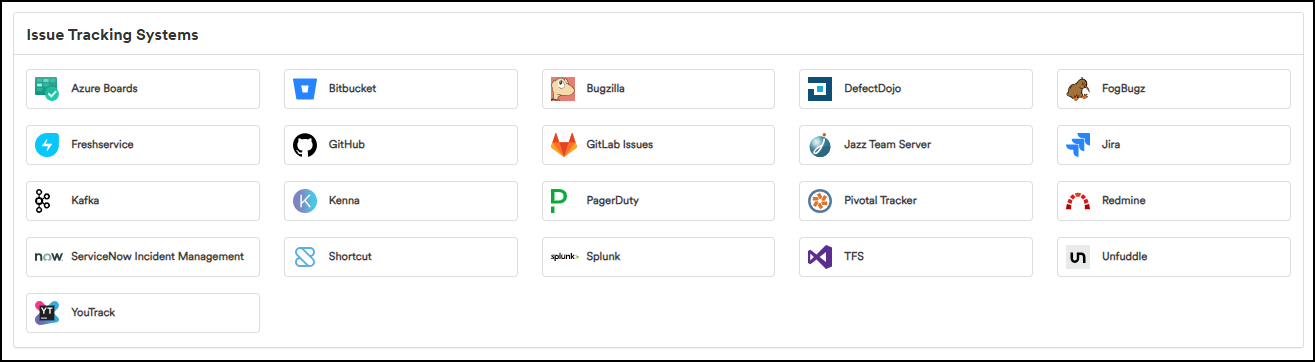
Step 4: Integrate with an issue tracking tool
Simplify issue management by integrating Invicti Enterprise with an issue tracker. The scanner connects with your SDLC ecosystem, including vulnerability management, issue tracking, CI, and WAF tools, to streamline bug fixes.
For further information about integrations in general, refer to the Integrations overview document.
- Select Notifications > New Notification from the left-side menu to report critical issues to Jira once the scan is completed. Then, assign work items to developers directly from Jira.
- Configure bi-directional Jira integration. When a developer fixes an issue and submits a merge request, Invicti Enterprise tests the fix. If the issue persists, it's reassigned to the developer.
- To configure it, navigate to Integrations > New User Mapping, select Jira, and complete the integration.
For detailed information on issue tracking systems integration, refer to the Integrating Invicti Enterprise with an issue-tracking system document or the specific documentation for your issue tracker.
Step 5: Create a scan report
To view scan results, check the online scan summary once the scan is complete or export the findings to a shareable report file. Two commonly used formats are the Executive Summary Report for managers and the Detailed Scan Report for developers.
Executive Summary Report
- In the Recent Scans window, click Report by the relevant scan to open its report.
- Click Export to start the report configuration.
- From the Report drop-down, select the Executive Summary.
- From the Format drop-down, select PDF.
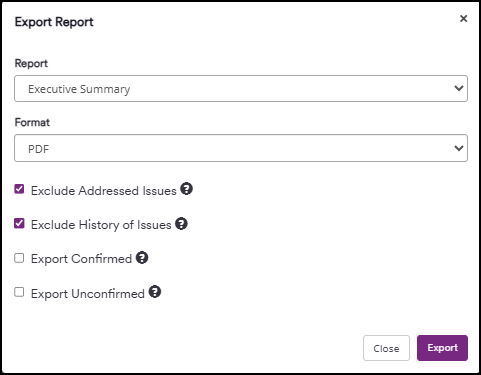
- Click Export to download the file.
Detailed Scan Report
- In the Recent Scans window, click Report by the relevant scan to open its report.
- Click Export to start the report configuration.
- From the Report drop-down, select the Detailed Scan Report.
- From the Format drop-down, select PDF.
- Click Export to download the file.
For more information about different types of reports, refer to the Reporting document.
This quick start guide introduces Invicti Enterprise. For detailed usage information, visit https://www.invicti.com/support. For further assistance, submit a Zendesk ticket to Support.