Internal Agents in Invicti Enterprise
Some organizations may have websites that are only accessible within their local network (and not on the internet). In these cases, our Internal Agent feature allows you to scan your internal targets while the results remain on our Invicti Enterprise servers. The Internal Agents feature is available in both Invicti Enterprise On-Demand and On-Premises. You can install an internal agent on Windows, Linux, Docker, Kubernetes, and OpenShift.
This document provides information about the requirements for internal agents to operate effectively, and how to configure an internal agent for a target and then scan an internal target using a scan agent.
NOTE: For information about installing an internal agent on your network, refer to the relevant documentation: |

Whitelisting requirements
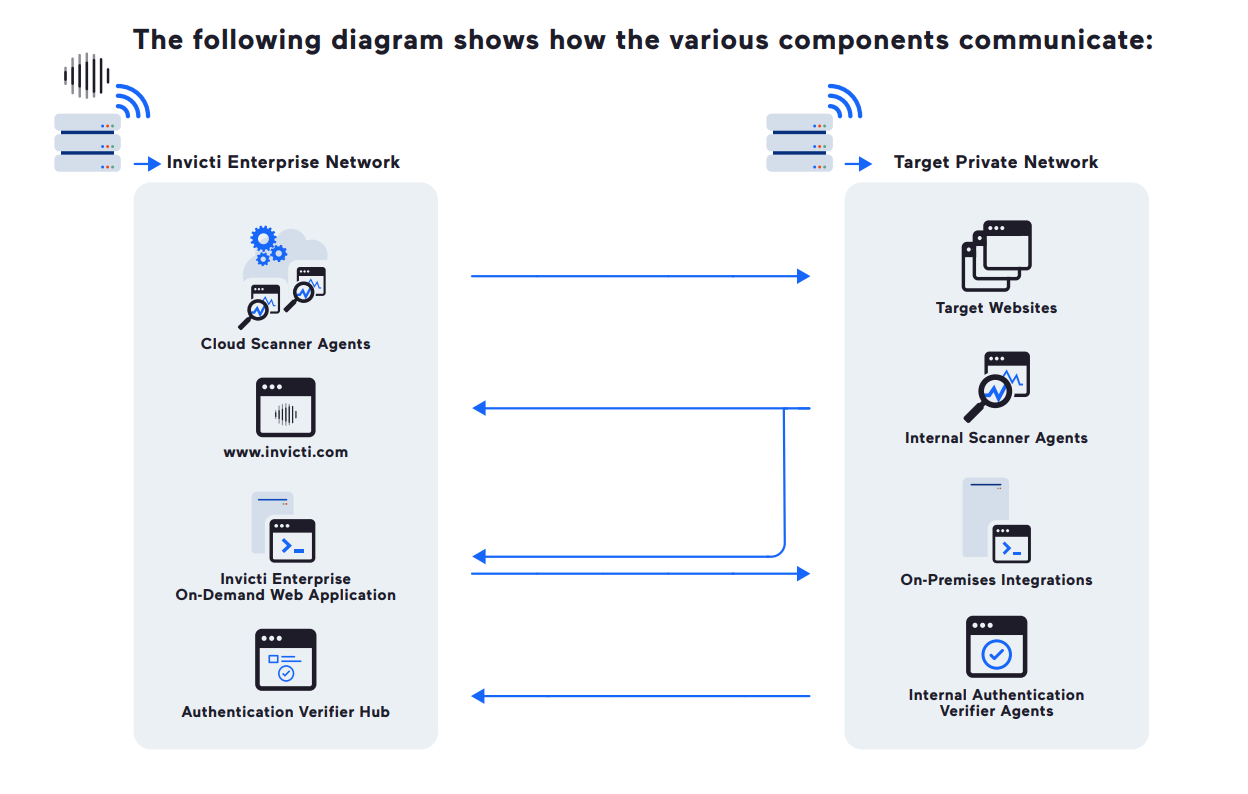
The Invicti Enterprise web application and internal agents use certain IP addresses to communicate with one another. For effective operation, you need to whitelist those IP addresses on your firewall and/or proxy servers. Without establishing this communication, you may run into problems, such as:
- The scanner agent may not report all of its findings to the Invicti Enterprise web application.
- Invicti Enterprise may not push the vulnerabilities to the on-premises integration endpoints, such as Jira.
Refer to these documents to whitelist the correct IP addresses based on your region:
- Whitelisting requirements for Invicti Enterprise On_Demand - US region
- Whitelisting requirements for Invicti Enterprise On_Demand - US-2 region
- Whitelisting requirements for Invicti Enterprise On_Demand - EU region
- Whitelisting requirements for Invicti Enterprise On_Demand - CA region
- Whitelisting requirements for Invicti Enterprise On-Premises
TIP: We strongly recommend whitelisting the IP addresses only if you plan to install any of the following components:
|

How to configure an internal agent for a website
After installing the internal agent on your network, you should specify a target to scan with the internal agent.
- Select Targets > New Target from the left-side menu.
- Complete the fields, as described in Adding a target.
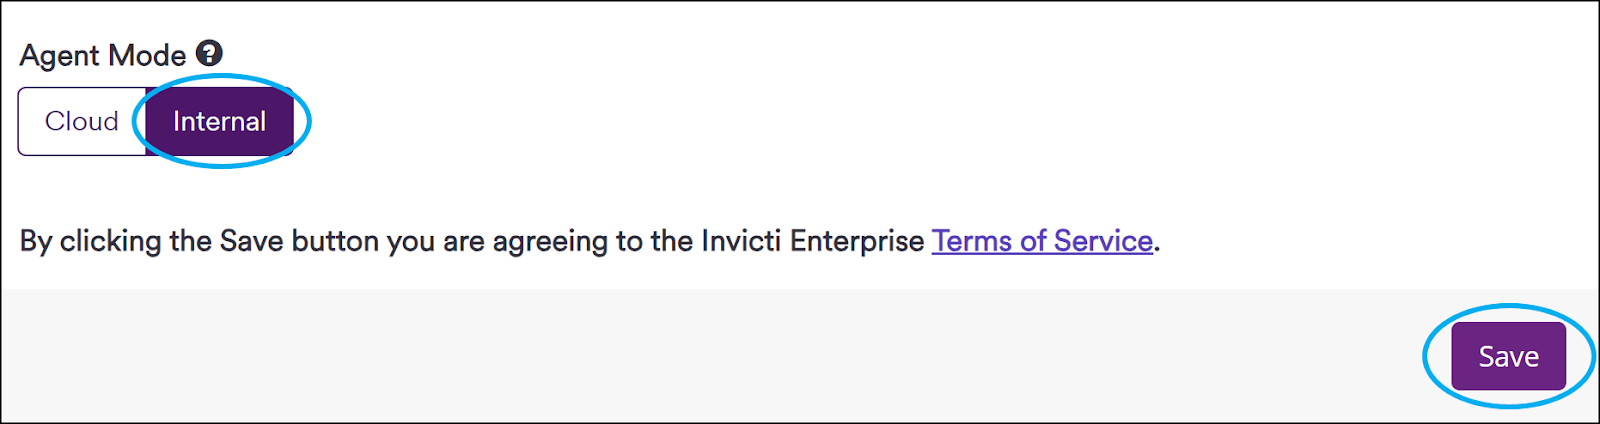
- In the Agent Mode field, select Internal.
- Click Save.
How to scan an internal website
After installing an agent and determining which target will be scanned with the internal agent, you can start a scan on your internal website.
- Select Scans > New Scan from the left-side menu.
- In the Target URL field, enter the URL of the internal website.
- From the Preferred Agent drop-down, select an internal agent to use during the scan. Alternatively, you can retain the default setting (Any of the available agents), so that Invicti Enterprise will automatically select an internal agent to use.
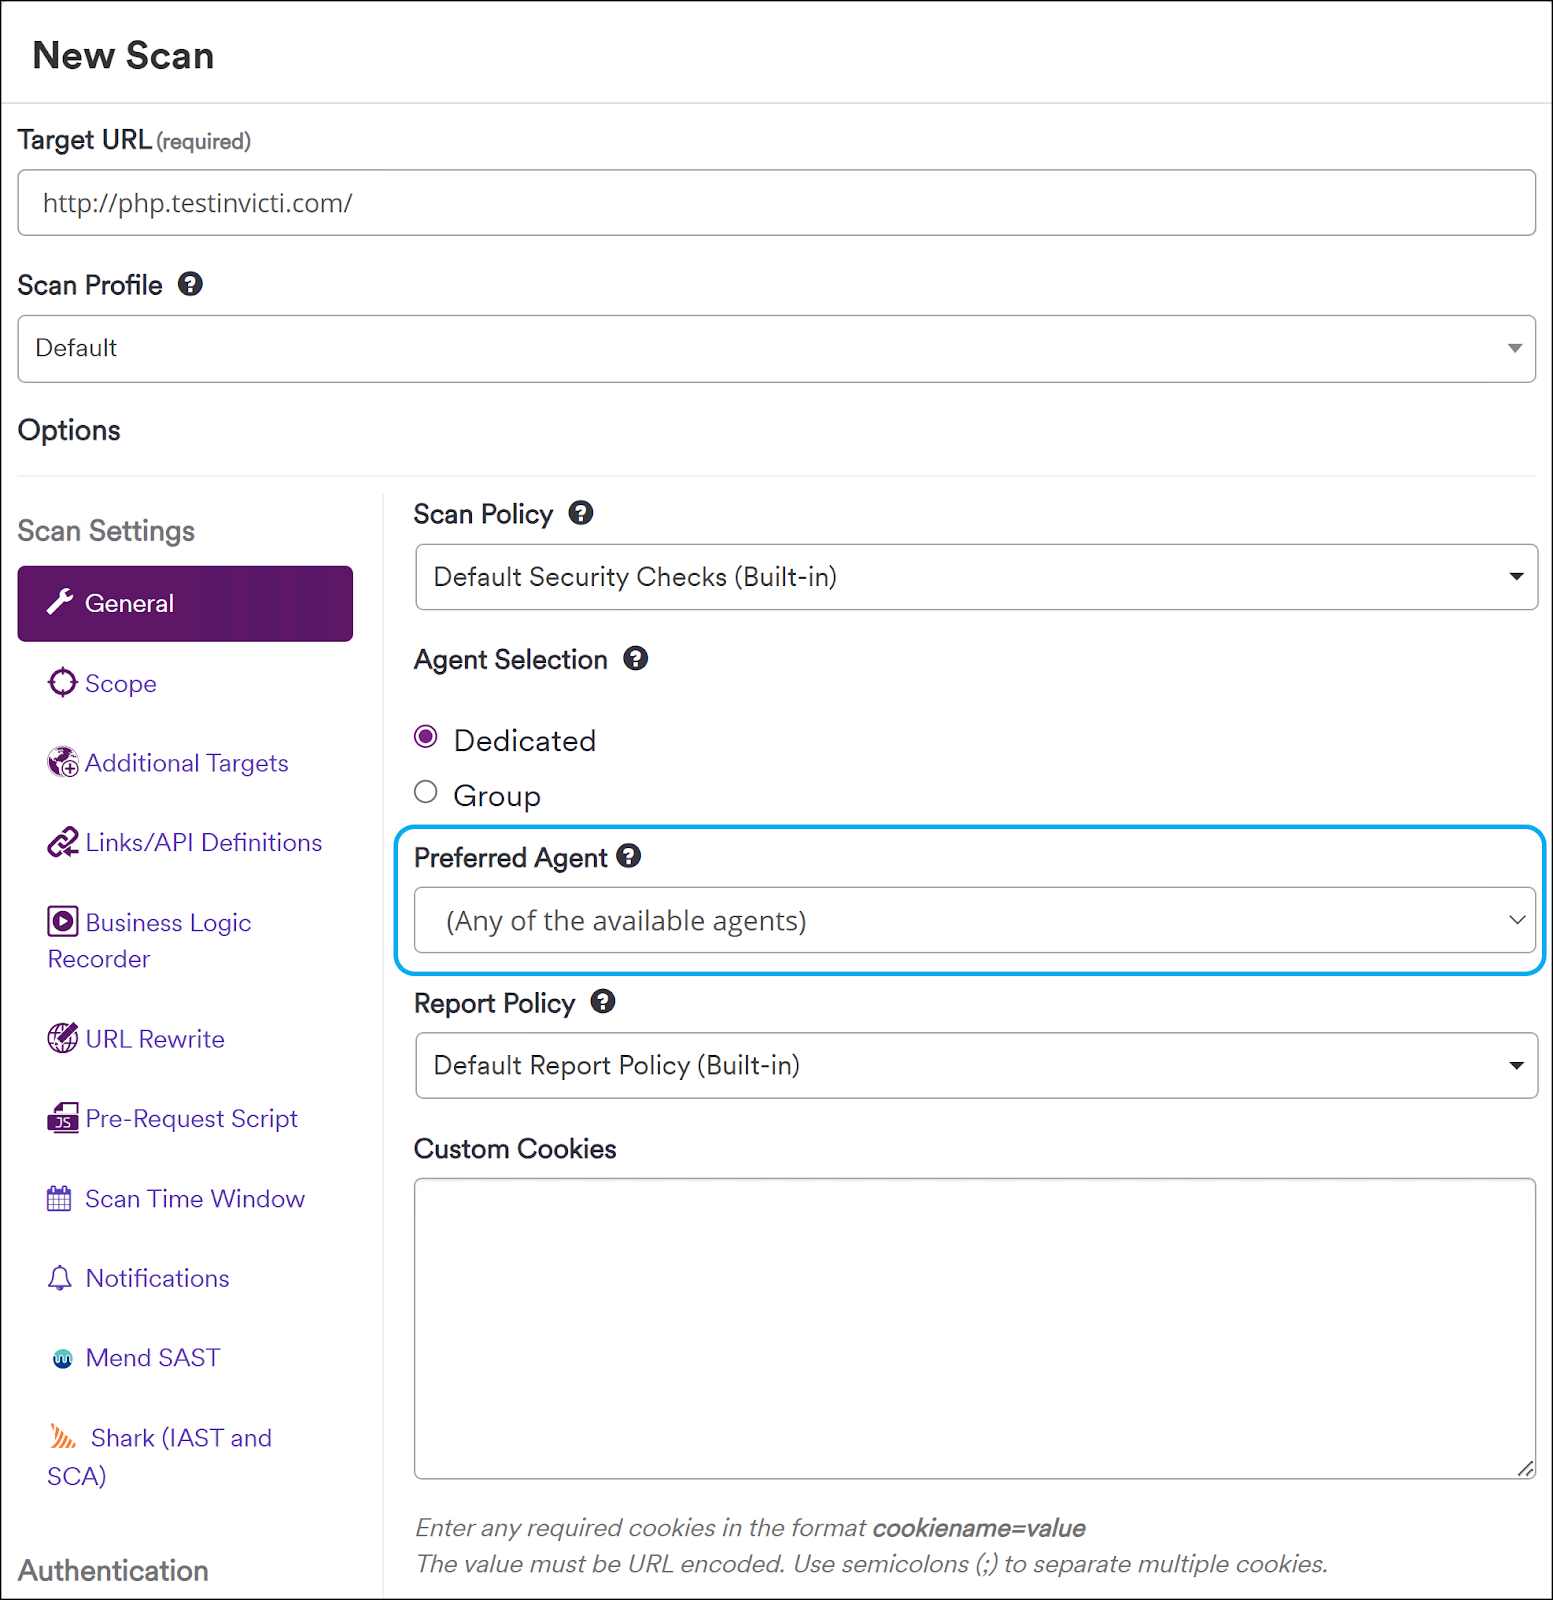
- Complete the remaining fields, and select Launch.
Managing Agents
Select Agents > Manage Agents to view a list of all internal agents you have set up. The table below explains the information displayed on the Agents page.
Column Title | Description |
Name | This is the name of the agent. |
State | Whether the agent is online and waiting for a scan assignment.
|
Launch Date | The date and time when the agent was first available. |
Last Heartbeat | This is the last time the agent communicated with the web application. |
Version | This is the version number of the scanner agent. |
Is Up To Date | This is whether the agent is up-to-date. |
VDB Version | This is the version number of the Vulnerability Database running on the agent. |
Operating System | This is the operating system on which the agent is installed. |
Installed Framework | This is the .NET environment on which the agent is running. Internal agents are bundled with the required .NET framework, so you don’t need to install .NET into your environment. Also, the installed framework version and your .NET version can be different. |
Operating System Architecture | This represents the operating system architecture on which the agent is installed. |
Process Architecture | This represents the process architecture on which the agent is installed. |
Target URL | This is the target URL of the website, including the path. |
IP Address | This is the IPv4 version of the agent. |