Creating a New Scan
Invicti lets you scan web applications immediately, by selecting the default scan settings.
Nevertheless, there are multiple, customizable scan options available. Each option is explained in the following sections.
For further details, see Invicti Assistant, Overview of Scanning, Overview of Scan Policies, and Scheduling Scans.
Invicti Enterprise New Scan Fields
This table lists and explains the fields on the New Scan page.
| Field | Description |
| Target URL | This is the target URL of the website, including the path. You can add a URL in the following formats: Hostname: http://www.example.com IPv4: http://192.168.1.42/ IPv6: http://[fe80::8554:69c3:bb4:b28a]/ |
| Scan Profile | This is the Scan Profile. For further information, see Configuring Scan Profiles. |
| Scan Tags | This option lets you enter a name or value to group website(s). Tags can consist of a name and a value, separated with a colon character; that is name: value. Or, they can be a single word. For further information about the scan tags, see Tagging scans in Invicti Enterprise. |
| Comments | This option allows users to add a comment to their scan during a launch. This comment is displayed on the scan report. |
Invicti Enterprise New Scan Options Fields
The Options section is divided into Scan Settings and Authentication. This section lists and explains the fields in the Options section.
General
In this Scan Settings tab, you can configure the basic scanning options.
| Field | Description |
| Scan Policy | The Scan Policy defines the scan settings and which security tests will be performed. For further information, see Overview of Scan Policies and Scan Policies and the Scan Policy Editor. |
| Agent Selection | This is the type of Agent that will run the scan. The options are Dedicated or Group. If you select Group, the Preferred Agent field (next) changes to Preferred Agent Group. This field is only available in Invicti Enterprise (On-Premises) or if Agent Mode is selected as Internal in the Website Settings for scanning websites in Invicti Enterprise. |
| Preferred Agent/Preferred Agent Group | The Agent is a service application that executes scans and informs the Invicti Enterprise application. Select an Agent or Agent Group. This field is only available in Invicti Enterprise (On-Premises) or if Agent Mode is selected as Internal in the Website Settings for scanning websites in Invicti Enterprise. It is vailable according to the team the user is assigned to and the agents assigned to that team. |
| Report Policy | The Report Policy defines how scan results will be reported. For further information, see Custom Report Policies. |
| Authentication Profiles | The Authentication Profile specifies which profile will be used for authentication during the scan. For further information, see Authentication Profiles. This field is only available if you saved any authentication profile. |
| Custom Cookies | This contains any required cookies in the format cookiename=value. The value must be URL encoded. Use semicolons (;) to separate multiple cookies. |
| Advanced Crawling Settings | This indicates how the scan should crawl the Target URL. The options are: Find and Follow New Links: This enables Invicti to find and follow new links in the crawled pages. By default, this option is enabled. Disabling this option could significantly impact the scan’s coverage, resulting in missed vulnerabilities and links. So, it is highly recommended to keep this option enabled to ensure Invicti’s maximum scanning effectiveness. Enable Crawl & Attack at the Same Time: This lets Invicti attack the web application and finds vulnerabilities while crawling is still running. By default, this feature is enabled. Disabling this option requires Invicti to wait for the crawling process to complete before it can begin the attack phase, potentially prolonging the scan duration. |
| Maximum Scan Duration | This indicates the maximum length of the scan. Drag the slider as required. If the scan is not completed within this time, it is automatically terminated. On the New Group Scan and Scheduling Group Scan page, there are checks to: Customize Max Scan Duration – Enable this setting to configure the maximum scan duration in hours. If your scan isn’t completed within this time, it will be automatically terminated. Customize Scan Time Windows – Enable this setting to configure the periods during which scanning is allowed. Scanning is paused during disallowed hours. For further information, see Scan Time Window. |
Scope
In this Scan Settings tab, you can configure the Scan Scope.
In addition, you can:
- Enter a list of Regular Expressions to Exclude or Include URLs
- Select whether the scanner should Include or Exclude the RegEx patterns
- Specify Disallowed HTTP Methods
For further information, see Configuring the Scan Scope.
Additional Websites
In this Scan Settings tab, you can add additional links to domains that need to be scanned, other than the domain of the target URL.
For further information, see Configuring Additional Websites.
Importing links and API definitions
In this Scan Settings tab, you can add any pages that you also want to scan, that are not linked from anywhere on the target website.
For further information, see Importing links and API definitions.
URL Rewrite
In this Scan Settings tab, you can configure URL Rewrite rules for the scan.
- Heuristic mode, to automatically detect the URL
- Custom mode, to configure the URL Rewrite rules for a faster scan
For further information, see URL Rewrites.
Pre-Request Script
In this Scan Settings tab, you can configure Pre-Request Script options.
This is an Invicti Enterprise On-Premises and Invicti Standard feature. For Invicti Enterprise On-Demand, you need to submit a ticket through our Help Center to enable the feature.
| Field | Description |
| Enabled | Select to enable Pre-Request Script. Once enabled, the Presets dropdown is activated. |
| Presets | This allows you to select the HMAC option and view the relevant script. |
| Test Script | This allows you to test the new script. |
Scan Time Window
In this Scan Settings tab, you can configure the time periods in the week during which scanning is allowed and paused.
For further information, see Scan Time Window.
Notifications
In this Scan Settings tab, you can configure notifications to instantly inform you about the status of a web application security scan, or when specific vulnerabilities are detected. You also manage notification priorities and test a notification.
For more information, see Managing Notifications.
PCI Scan
In this Scan Settings tab, you can conduct a PCI Scan to receive approved PCI compliance reports for your public websites.
For further information, see PCI DSS Scanning in Invicti.
Shark (IAST and SCA)
In this Scan Settings tab, you can enable Invicti to run interactive application security testing for your websites.
For further information, see Deploying Invicti Shark.
Form
In this Authentication tab, you can configure Form Authentication options.
For further information, see Configuring and Verifying Form Authentication in Invicti Enterprise.
Basic NTLM/Kerberos
In this Authentication tab, you can configure Basic, NTLM/Kerberos, Digest or Negotiate authentication.
For further information, see Configuring Basic, Digest, NTLM/Kerberos and Negotiate Authentication.
Header
In this Authentication tab, you can configure HTTP Header authentication.
For further information, see Configuring Header Authentication.
Client Certificate
In this Authentication tab, you can configure Client Certificate authentication.
For further information, see Configuring Client Certificate Authentication.
OAuth2
In this Authentication tab, you can configure OAuth2 authentication.
For further information, see Configuring OAuth2 Authentication.
How to scan a website in Invicti Enterprise
In Invicti Enterprise, there are two ways to launch a scan:
- You can access a new scan page via a shortcut located next to [Your Name].
- Or, you can access a new scan window from the main menu.
Before scanning your first website in Invicti Enterprise, make sure you have added a website (Adding A Website in Invicti Enterprise).
- Log in to Invicti Enterprise.
- From the main menu, select Scans > New Scan.

- In the Target URL field, enter the URL.
- Complete the remainder of the fields, as described in Invicti Enterprise New Scan Fields and Invicti Enterprise Scan Options Fields.
- Select Launch.
How to run a Group Scan in Invicti Enterprise
- From the main menu, select Scans > New Group Scan.

- From the Website Group drop-down, select the website group you want to scan.
- Complete the remainder of the fields, as described in How to Scan a Website in Invicti Enterprise.
- Select Launch.
You can also launch Group Scans from the Manage Groups page (select Scan).
How to run an Incremental Scan in Invicti Enterprise
- From the main menu, select Scans > Recent Scans.
- Next to the relevant scan, select Report.
- From the Scan drop-down, select Incremental Scan.
- Select Launch.
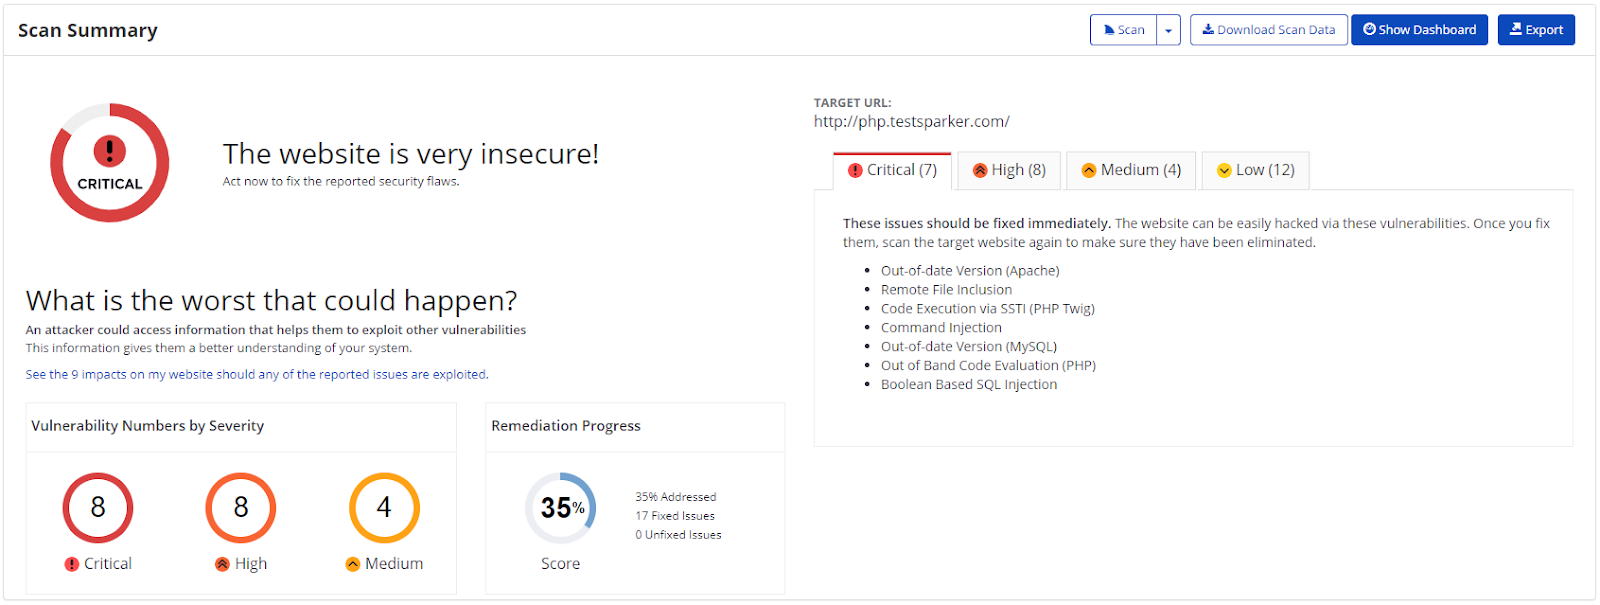
How to run a Retest in Invicti Enterprise
- From the main menu, select Scans > Recent Scans.
- Next to the scan for which you want to run a Retest, select the Scan drop-down, then Retest.
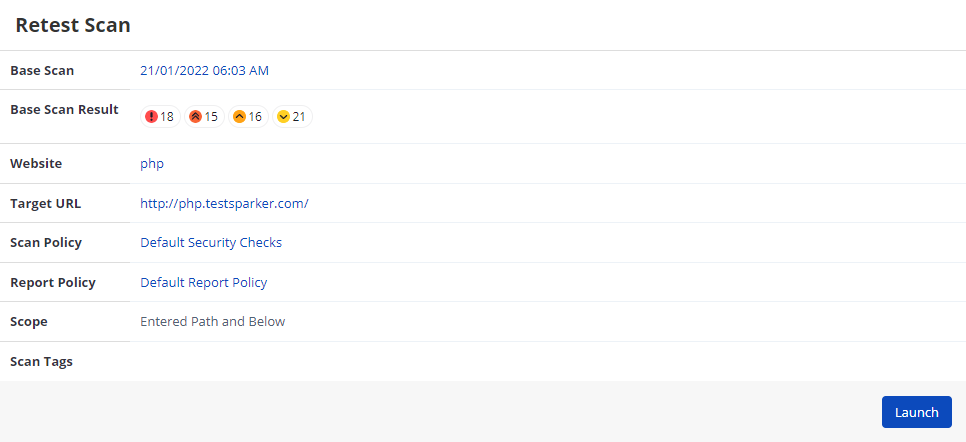
- Select Launch.
How to run Bulk Operations on a Scan in Invicti Enterprise
- From the main menu, select Scans > Recent Scans.
- Next to the scans for which you want to run a bulk operation, select the checkbox.
- Select the Bulk drop-down, and select the bulk operation you want.

- A dialog is displayed asking you to confirm your choice.

- Select Delete, Cancel, or Pause as required.
How to cancel or pause a scan in Invicti Enterprise
- Launch a scan in Invicti Enterprise (see How to Scan a Website in Invicti Enterprise).
- If you want to cancel the scan, select Cancel.

The Cancel Scan dialog is displayed.
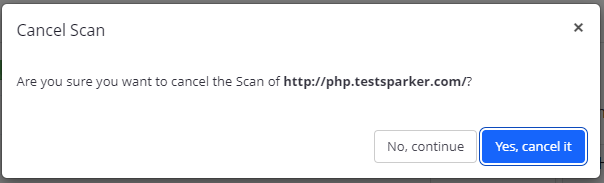
- Select Yes, cancel it.
- If you want to simply pause the scan instead, select the Cancel drop-down, then Pause.
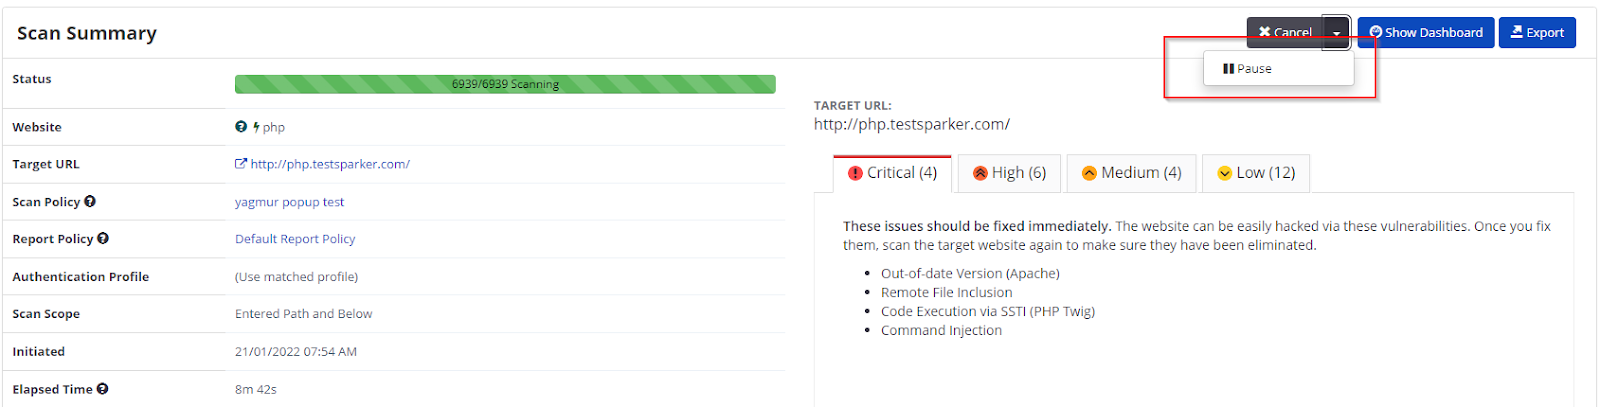
The Pause Scan dialog is displayed.

- Select Yes, pause it.
Invicti Standard New Scan Fields
This table lists and explains the fields in the Start a New Website or Web Service Scan dialog.
| Field | Description |
| Target Website or Web Service URL | This is the target URL of the website or web service. |
| Scan Profile | This is the Scan Profile. For further information, see Configuring Scan Profiles. |
This section lists and explains the fields in the Options section of the Start a New Website or Web Service Scan dialog box, which is divided into two further sections:
- Scan Settings
- Authentication
Scan Settings – General
In this tab, you can configure the basic scanning options.
| Field | Description |
| Scan Policy | The Scan Policy defines the scan settings and which security tests will be performed. You can also define the Scan Policy so that a PCI Checks test is performed. For further information, see Overview of Scan Policies, Scan Policy Editor, and PCI Scanning in Invicti. |
| Report Policy | The Report Policy defines how scan results will be reported. For further information, see Custom Report Policies. |
| Authentication Profile | The Authentication Profile specifies which profile will be used for authentication during the scan. For further information, see Authentication Profile. |
| Custom Cookies | This contains any required cookies in the format cookiename=value. All configured cookies in Invicti Standard are sent with every HTTP request and cannot be expired by server responses. To add a custom cookie, type in the cookie name and its value in the Custom Cookie section of the Scan Policy in the General tab. The value must be URL encoded. Use semicolons (;) to separate multiple cookies. For example: CookieName1=Value1; CookieName2=Value2; CookieName3=Value3 |
| Crawling | This indicates how the scan should crawl the Target URL. The options are: Find and Follow New Links: This enables Invicti to find and follow new links in the crawled pages. By default, this option is enabled. Disabling this option could significantly impact the scan’s coverage, resulting in missed vulnerabilities and links. So, it is highly recommended to keep this option enabled to ensure Invicti’s maximum scanning effectiveness. Enable Crawl & Attack at the Same Time: This lets Invicti attack the web application and finds vulnerabilities while crawling is still running. By default, this feature is enabled. Disabling this option requires Invicti to wait for the crawling process to complete before it can begin the attack phase, potentially prolonging the scan duration. Pause Scan After Crawling: This lets Invicti pause after the crawling phase is over. So, you can include and exclude web pages from the tests. Incremental Scan: This lets you run an incremental scan only if you have a full base scan. For further information, see Incremental scans. |
Scan Settings – Scope
In this tab, you can configure the Scan Scope, RegEx expressions, and HTTP Methods.
In addition, you can:
- Enter a list of Regular Expressions to Exclude or Include URLs
- Select whether the scanner should Include or Exclude the RegEx patterns
- Specify Disallowed HTTP Methods
For further information, see Configuring the Scan Scope.
Scan Settings – Additional Websites
In this tab, you can add additional links to domains that need to be scanned other than the domain of the target URL.
For further information see, Configuring Additional Websites.
Scan Settings – Links/API Definition
In this tab, you can add URLs, that you also want to scan, that are not linked from anywhere on the target website.
For further information, see Importing links/API definitions.
Scan Settings – URL Rewrite
In this tab, you can configure URL Rewrite rules for the scan.
- Heuristic mode, to automatically detect the URL
- Custom mode, to configure the URL Rewrite rules for a faster scan
For further information, see URL Rewrites.
Scan Settings – Pre-Request Script
In this Scan Settings tab, you can configure Pre-Request Script options for the scan.
For further information, see Pre-Request Scripts in Invicti Standard.
Shark (IAST)
In this Scan Settings tab, you can enable Invicti to run interactive application security testing for your websites.
For further information, see Deploying Invicti Shark.
Authentication – Form
In this tab, you can configure Form Authentication options.
For further information, see Configuring Form Authentication in Invicti Standard.
Authentication – Basic, NTLM/Kerberos
In this tab, you can configure Basic, Digest, NTLM/Kerberos and Negotiate options.
For further information, see Configuring Basic, Digest, NTLM/Kerberos and Negotiate Authentication.
Authentication – Header
In this tab, you can configure HTTP Header authentication.
For further information, see Configuring Header Authentication.
Authentication – Client Certificate
In this tab, you can configure Client Certificate authentication.
For further information, see Configuring Client Certificate Authentication.
Authentication – Smart Card
In this tab, you can configure Smart Card authentication.
For more information, see Configuring Smart Card Authentication in Invicti Standard.
Authentication – OAuth2
In this tab, you can configure OAuth2 authentication.
For further information, see Configuring OAuth2 Authentication.
Authentication – Manual Authentication
In this tab, you can configure Manual authentication.
For further information, see Manual Authentication.
How to scan a website in Invicti Standard
- Open Invicti Standard.
- In the Home tab, select New. The Start a New Website or New Service Scan dialog is displayed.
- In the Target Website or Web Service URL field, enter the website URL you want to scan.
- Configure the Scan Policy, Invicti Standard Scan Options Fields, and Authentication as required.
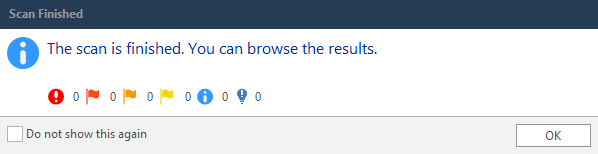
- From the Crawl and Wait drop-down, select Start Scan.
- When the scan is completed, and the Invicti Standard window is in the background, a Scan Finished information dialog is displayed.
How to run an Incremental Scan in Invicti Standard
- Open Invicti Standard.
- In the Home tab, select Incremental.
- Select the file of the already completed scan and then Open.
- The scan is imported and displayed in the UI, with the Start a New Website or Web Service Scan dialog open.

- Configure the Scan Policy, Scan Options Fields, and Authentication as required.
- Select Incremental Scan.
How to run a Retest in Invicti Standard
- Open Invicti Standard.
- Select the File tab.
- Double-click to select the scan you want to retest and wait until it loads. The Vulnerability tab is displayed.
- If you wish to:
- Retest the entire scan: Select the scan name at the top of the Sitemap panel, right-click and select Retest All

- Retest a single vulnerability: Select the vulnerability name in the Issues panel, right-click and select Retest

How to scan only imported links in Invicti Standard
- Open Invicti Standard
- In the Home tab, select New.
- In the Target Website or Web Service URL field, enter the website URL you want to scan.
- From the Scan Settings section, select Links/API Definitions.
- Import your links as described in the How to import links/API definitions in Invicti Standard.
- From the Start Scan drop-down, select Scan Imported Links Only.

This starts your scan.
Please note that when you choose to scan only imported links, Invicti’s “Find and Follow New Links” option is automatically disabled. This means that Invicti cannot identify any new links based on the imported links provided, potentially resulting in missed vulnerabilities.
How to run a Controlled Scan in Invicti Standard
- Open Invicti Standard.
- Select the File tab. The Local Scans list is displayed.
- From the list of previous scans, click the one you want to run as a controlled scan and wait until it loads.
- Select the View tab and click Controlled Scan on the ribbon. The Controlled Scan panel is displayed.

- From the Controlled Scan panel:
- In the Choose Parameters to Scan area, enter the page or parameters you want to scan
- Or, in Choose Security Tests, select the specific vulnerabilities you want to scan
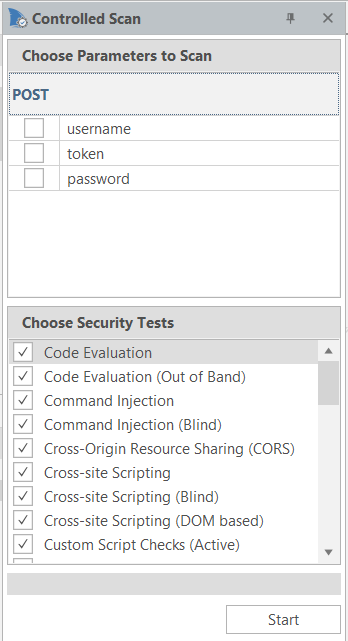
- Select Start.
How to start a new instance of Invicti Standard in Invicti Standard
To run a different scan with each instance, you can open multiple new instances of Invicti Standard at once.
- Open Invicti Standard.
- From the Home tab, select New Instance. A new instance of Invicti Standard starts.

- The Welcome Dashboard of the new instance is displayed.
How to pause a scan in Invicti Standard
- Launch a scan in Invicti Standard.
- If you want to pause the scan, select Pause in the Scan tab or the Quick Access Toolbar.

The scan is paused.
- When you want to continue the scan, select Resume.

The scan will continue.
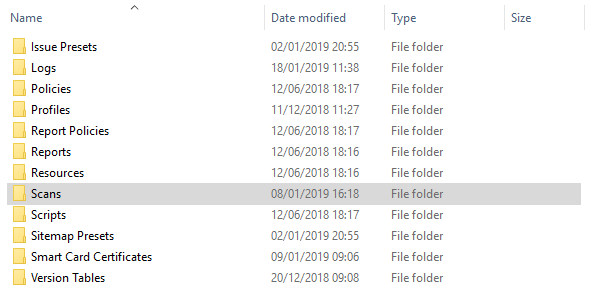
Recovering Unexpectedly Terminated Scans in Invicti Standard
Invicti Standard has a built-in auto-save feature. If a scan is interrupted unexpectedly – for example, due to a computer restart – you can reload the partial scan and continue scanning.
The auto-saved files are stored in this folder and the progress is saved every fifteen minutes:
My Documents\Invicti\Scans\[WEBSITE-NAME]
The two files that are created are:
- AutoSave.ndb
- AutoSave.nss
If you start Invicti Standard after a scan was interrupted unexpectedly, the scanner will automatically resume that scan.
For further information, see How to Start a New Instance of Invicti Standard in Invicti Standard and How to Prevent the Operating System From Going to Sleep While There is a Scan in Progress.
How to Recover Unexpectedly Terminated Scans in Invicti Standard
- Open My Documents\Invicti\.
- Double-click on the Scans folder.
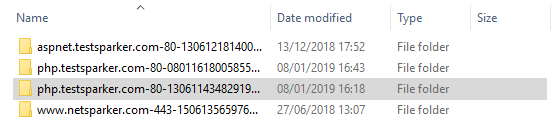
- Select the relevant scan folder by Name and Date.

- Double-click the AutoSave Invicti Scan Session file. Invicti Standard will automatically reopen.
- On the Quick Access Toolbar, click the Resume Scan button, or in the Scan tab, click Resume. The unexpectedly terminated scan will resume.