Managing Notifications
Notifications in Invicti Enterprise allow you to stay informed about important events, such as scan statuses and detected vulnerabilities.
By default, there are some built-in notifications that can be cloned and edited. If you want to create a brand new notification rather than clone an existing one, refer to Creating notifications. There is a separate document for technology notifications that describes how to turn specific technology notifications on or off, and how to manage built-in, out-of-date notifications.
This document provides instructions on managing and customizing notifications to ensure you receive the correct alerts. It covers:
- How to view notifications
- How to clone notifications
- How to edit notifications
- How to delete notifications
How to view all notifications
- Select Notifications > Manage Notifications from the left-side menu.
- Review the list to see all configured alerts, including their status, triggering event, and target scope.
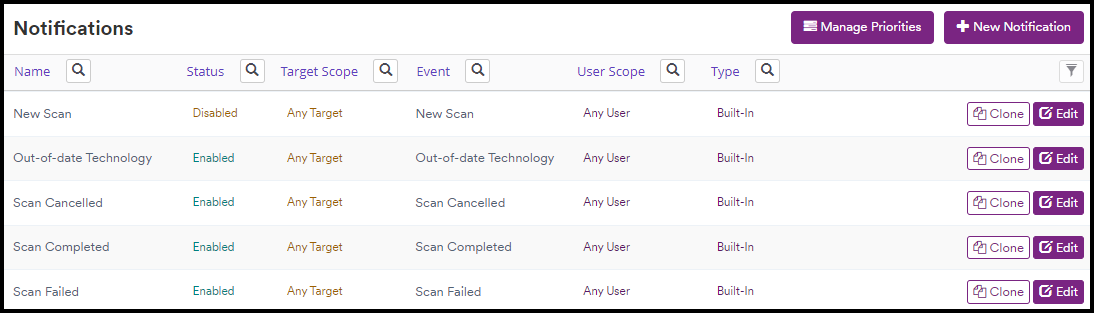
- Search for the desired notification or use the filters to narrow down the results. Filtering options include:
- Name: The notification’s name.
- Status: Indicates if the notification is Enabled or Disabled.
- Target Scope: Shows if the notification applies to a target or target group.
- Event: The scan event that triggers the notification.
- User Scope: Specifies who receives the notification.
- Type: Indicates the creator of the notification. Displays built-in for system-generated notifications or mine for your personal notifications.
How to clone notifications
- Select Notifications > Manage Notifications from the left-side menu.
- Select Clone next to the notification you want to clone.

- Enter a name for the new notification.
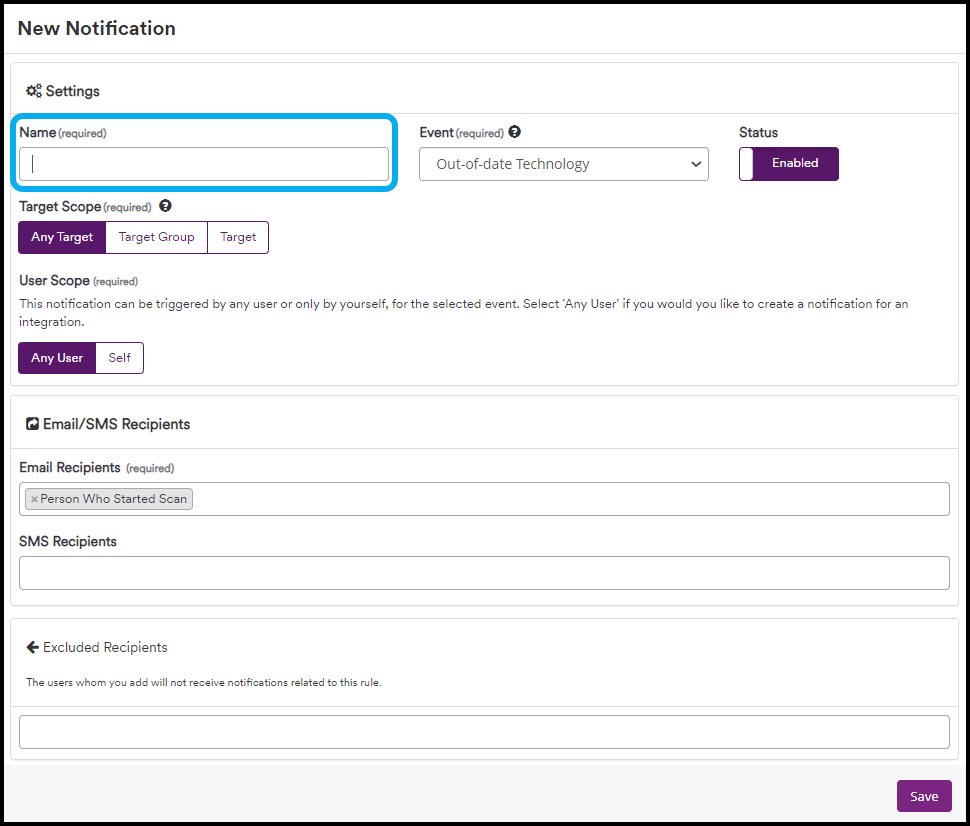
- Edit the other fields as needed. For explanations of the various fields, refer to Creating notifications.
- Click Save. An information strip will appear to confirm the notification has been created.

- Check and adjust the notification priorities if needed by following the instructions in managing notification priorities.
How to edit notifications
- Select Notifications > Manage Notifications from the left-side menu.
- Select Edit next to the notification you want to edit.

- Edit any of the fields as needed. Refer to Creating notifications for information about each of the fields.
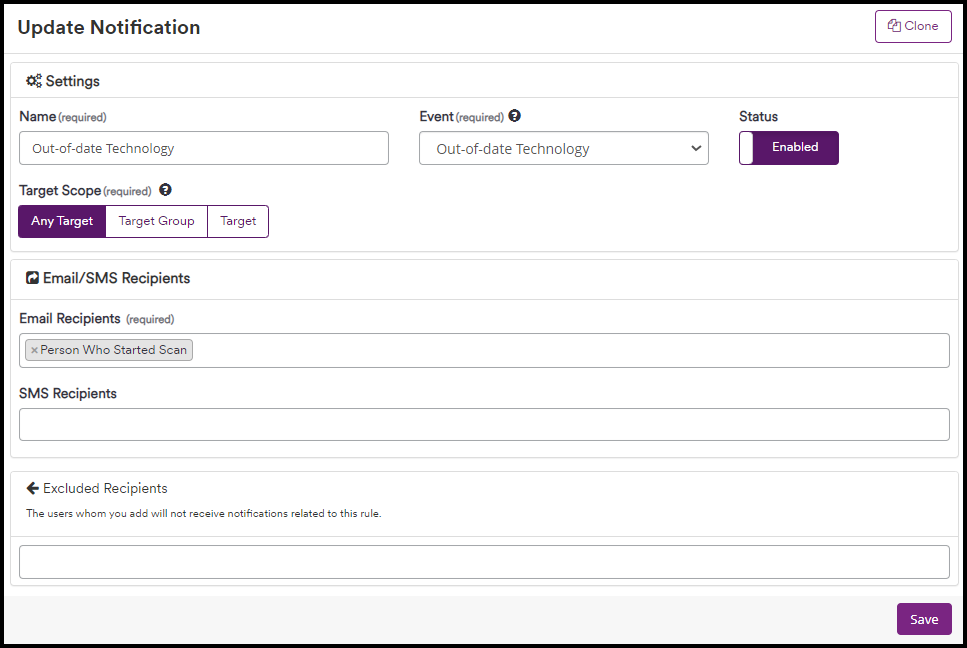
- Click Save. An information strip will appear to confirm the notification has been updated.

The notification will now operate according to the new configuration.
How to delete notifications
- Select Notifications > Manage Notifications from the left-side menu.
- Select Delete next to the notification you want to delete.

- Click Delete to confirm the action.
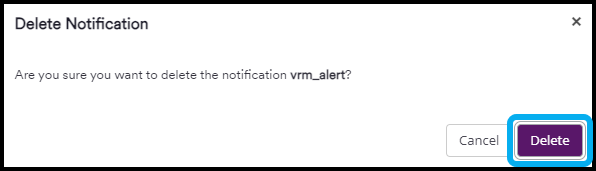
An information strip will appear to confirm the notification has been deleted.
