Setting up incremental scans
This guide shows you how to create an incremental scan in Invicti and how to view the detected changes.
Overview
With incremental scanning, you benefit from a more efficient and targeted approach to securing your API or web application, saving you time and resources by selectively scanning only newly discovered or modified pages. The incremental scanning feature streamlines the process by automatically filtering out minor changes, enhancing your user experience, and reducing the burden on your team. Additionally, minor changes such as displayed date/time or a visitor counter are automatically filtered out during the incremental scan, streamlining your security assessment process for a more user-friendly experience.
NOTE: Prior to running an incremental scan, an initial scan must be completed. The incremental scan then crawls only new or modified URLs. |

How to set up incremental scans in Invicti Enterprise
- From the main menu, select Scans > New Scan to open the New Scheduled Scan window.
- In the Target URL field, input the complete URL, including the path.
- Under Scan Type, choose Incremental to activate incremental scanning. This action automatically hides the Scan Options section.
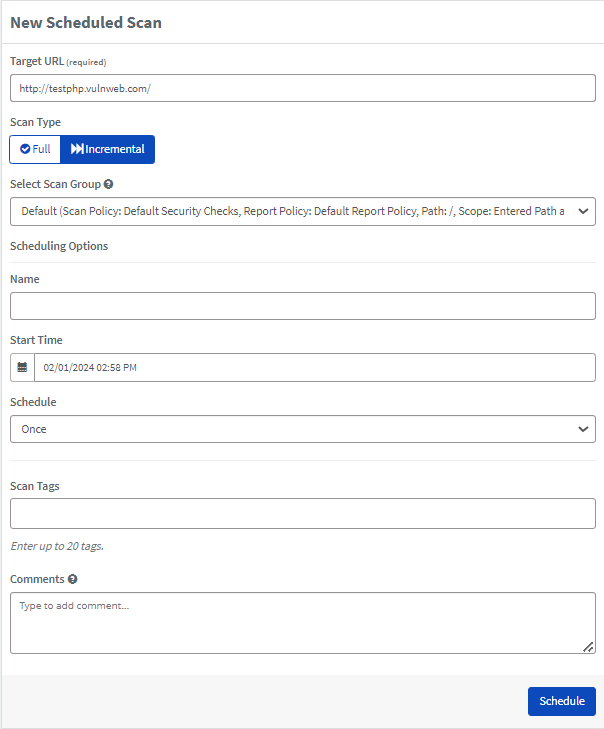
- Use the Select Scan Group dropdown to specify the Scan Group. Scan Groups represent scans configured with different settings (scan policy, scan scope, etc).
- Give the scan a Name and specify the Start Time.
- The Schedule allows you to specify the frequency of the scan. You can choose from the following options: Once, Daily, Weekly, Monthly, Yearly, Quarterly, Biannually, Custom.
- In the Scan tags field, you can enter as many as 20 scan tags. The tags allow you to give additional context to the scans and help you group similar scans under one tag. Refer to Tagging in Invicti for more information.
- Add any Comments you find useful and click Schedule. If you need further information, refer to How to Schedule a Full Scan in Invicti.
How to set up an incremental scan in Invicti Standard
- Open Invicti Standard.
- On the Home tab, click Schedule Incremental. The Import dialog is displayed.
- In the Import dialog, select the filename of your already completed scan and click Open. The Schedule a New Scan dialog is displayed.
- Complete the fields.
- Click Schedule Scan.
How to view the changes in Invicti Enterprise
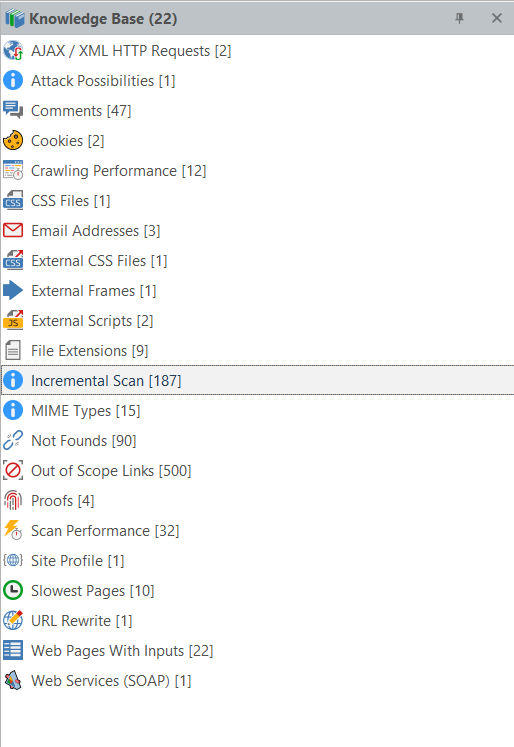
Once the scan is completed, all incremental scans are listed under the Incremental Scan node in the Knowledge Base. This information is also available in the Knowledge Base Report.
- In Invicti, navigate to Scans and select Recent Scans.
- Locate the incremental scan you are interested in and click Report on the far right.
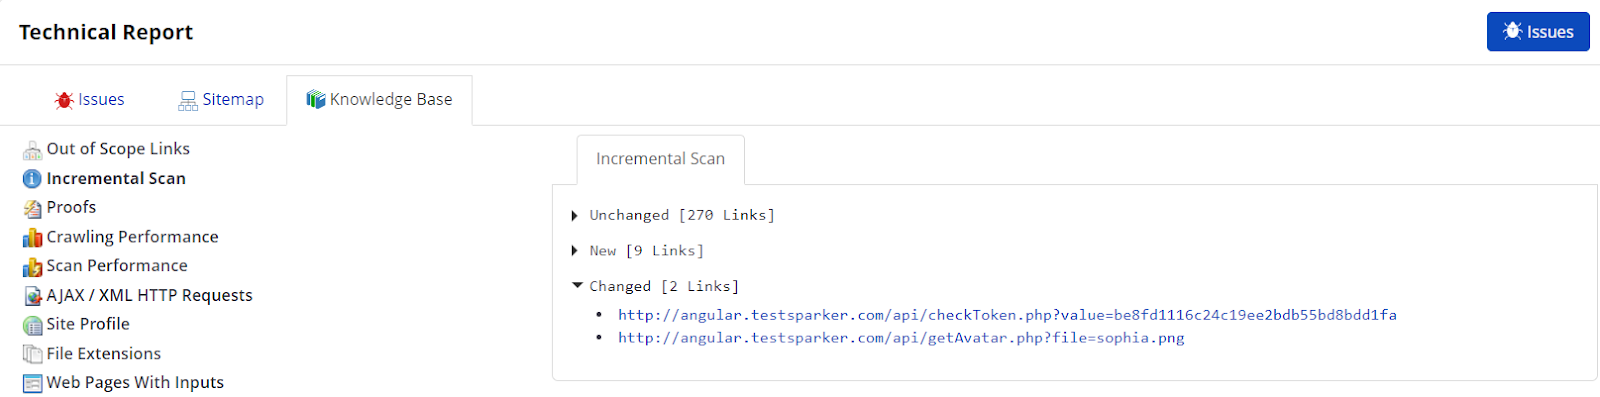
- In the Technical Report section, select the Knowledge Base tab.
- On the left, select Incremental Scan to view the list of results sorted into three groups - Unchanged, New, and Changed.
How to view the changes in Invicti Standard
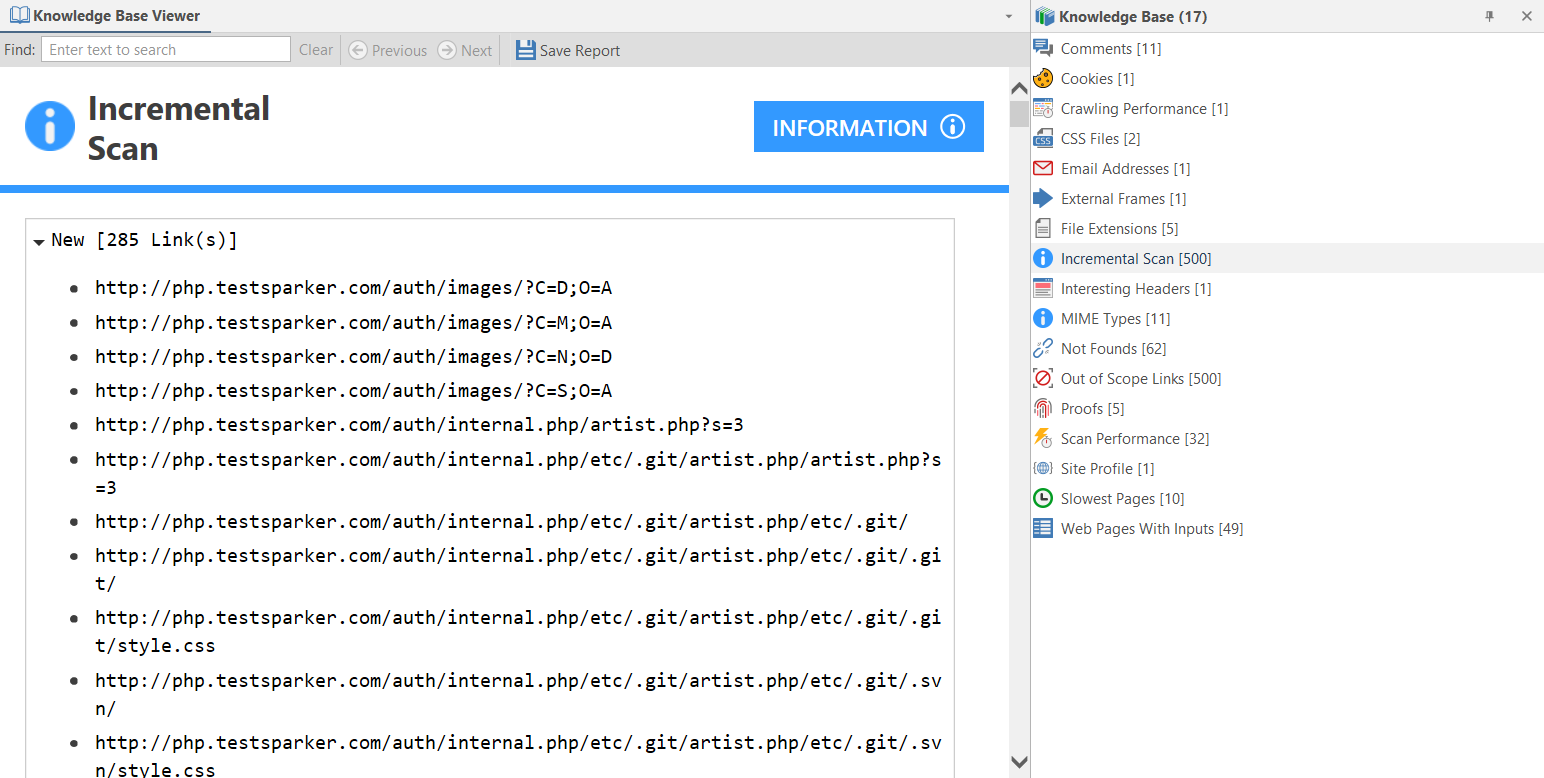
Once the scan is completed, all incremental scans are listed under the Incremental Scan node in the Knowledge Base. This information is also available in the Knowledge Base Report.
- Open Invicti Standard.
- Start a Scan or open a previously saved scan.
- The Knowledge Base is displayed on the right of the Scan Summary Dashboard. (If it is hidden, display it again using the Knowledge Base icon on the View tab on the ribbon. Alternatively, click the Reset Layout icon on the View tab, then close the Activity/Progress/Logs panes to give maximum viewing space.)
- Ensure that the Knowledge Base Viewer is also displayed. (If it is hidden, you can display it again using the Knowledge Base Viewer button on the View tab. You may also want to close the Activity/Progress/Logs panes.)
- Click the Incremental Scan node in the Knowledge Base. All detected Incremental Scan information is displayed in the Knowledge Base Viewer.