Viewing issues in Invicti Enterprise
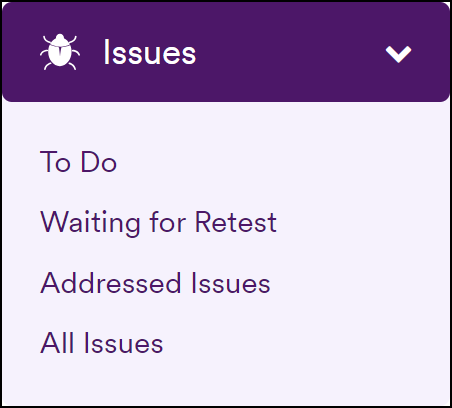
The Issues section in Invicti Enterprise provides various lists of the vulnerabilities detected in scans run by your entire team. The four submenus give an overview of issues that have been assigned to you, issues that are awaiting a retest, issues that have been addressed, and all detected issues.
This document provides information about viewing your detected vulnerabilities on each of these issues pages and the actions you can take, such as assigning issues or changing their status, sending issues to an integrated issue tracking system, or viewing more detailed information about a particular vulnerability.
TIP: You can also view issues using the Issues API Endpoints, enabling you to easily integrate with other applications or internal systems. |

Issues pages
The table below explains what information is displayed on each of the Issues pages. Click Issues in the left-side menu, then select one of the sub-menu items listed below to view that particular issues page.
Page/ Sub-menu | Description |
To Do | This page displays a list of all the issues that have been assigned to you. You can take action by fixing them, assigning them to someone else, or changing their status. |
Waiting for Retest | This page displays a list of all the issues with the status Fixed (Unconfirmed). They are waiting to be tested automatically by Invicti Enterprise. |
Addressed Issues | This page displays a list of all the issues that have been addressed and whose status has been updated to one of the following:
|
All Issues | This page displays a list of all issues detected in scans run by your entire team. The entire team can view all issues in a scan report, even if they only have the Manage Issues (Restricted) permission. |
Column view
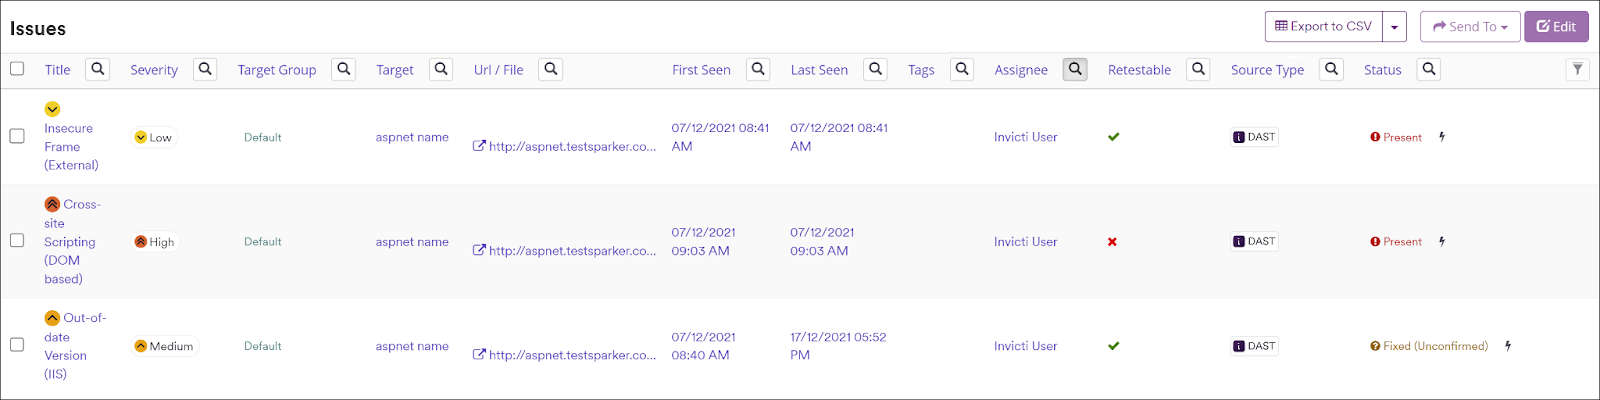
The information on each of the issues pages is displayed in a table format. Each of the table columns is explained below to help you understand the information you are viewing.
Column name | Description |
Title | This is the name of the vulnerability, for example Insecure Frame (External). Click on an issue title to view more detailed information about the vulnerability. Some issues are grouped, meaning they are reported only once per target. In these cases, a message is displayed when you click through to the issue details page. |
Severity | This is the vulnerability severity level. The options are:
For more information, refer to Vulnerability Severity Levels. |
Target Group | This is the name of the target group that the scanned target belongs to. |
Target | This is the name of the scanned target website. |
URL/File | This is the URL or file path of the detected issue. |
First Seen | This is the date and time the issue was first detected. |
Last Seen | This is when the issue was most recently detected. |
Tags | These are labels you can apply to group issues together or give additional context. For more information, refer to Tagging issues in Invicti Enterprise. |
Assignee | This is the name of the person who has been assigned to the issues. It may be:
|
Retestable | This indicates whether the issue can be retested. For more information, refer to Managing Issues. |
Source Type | This is the scan type that detected the vulnerability. For example, Invicti DAST, or Mend SAST. |
Status | This indicates the current status of the issue. All issues are initially marked as Present. The status options are:
|
Filtering issues
Each of the columns described above can be used to filter the issues table to create a view of the information according to your preferences. For more information, refer to Using filters in Invicti Enterprise.
Actioning issues
The following linked pages provide more detailed information about the actions you can take for each of your issues:
- Exporting a vulnerability to an issue tracking system
- Viewing the HTTP Request and Response of an Issue
For more information about the issue lifecycle, refer to Managing Issues.