Deploying Shark (IAST) in Invicti Enterprise On-Premises
You can run interactive security testing (IAST) with Invicti Shark in your web application in order to confirm more vulnerabilities and further minimize false positives.
By adding IAST capabilities with the Shark, Invicti provides the following benefits:
- Showing the exact location of the issue and reporting debug information
- Providing additional details to help security teams uncover more vulnerabilities
- Complementing existing Proof-based Scanning™ functionality to automatically prove even more vulnerabilities and simplify remediation efforts
- Ensuring that the entire web application is scanned, including any hidden and unlinked locations that may be inaccessible to the crawler
For Invicti Shark to operate, you need to download an agent and deploy it on your server. For security reasons, this agent is generated uniquely for each target website. Deploying the Shark sensor is optional.
Best practices for using Invicti Shark
Invicti Shark delivers optimal results when deployed in the right environment. Follow these guidelines for the best experience:
- Staging Servers: Install Invicti Shark on your staging servers to perform IAST analysis effectively. This is the ideal environment for such operations.
- CI/CD Pipelines: You can install Invicti Shark on virtual machines as part of CI/CD pipelines to integrate IAST analysis into your development process. In this setup, ensure that the Shark installation is configured within the CI/CD pipeline.
- Avoid Production Servers: We do not recommend installing Invicti Shark on production servers. Although it uses minimal resources, it could still impact the performance of your production environment.
For more information, refer to Changing the DAST Game with Invicti IAST.
How to download Shark sensors in Invicti Enterprise On-Premises
- Select Scans > New Scan from the left-side menu.
- Fill in the Target URL and Scan Profile.
- From the Scan Settings, select Shark (IAST and SCA).
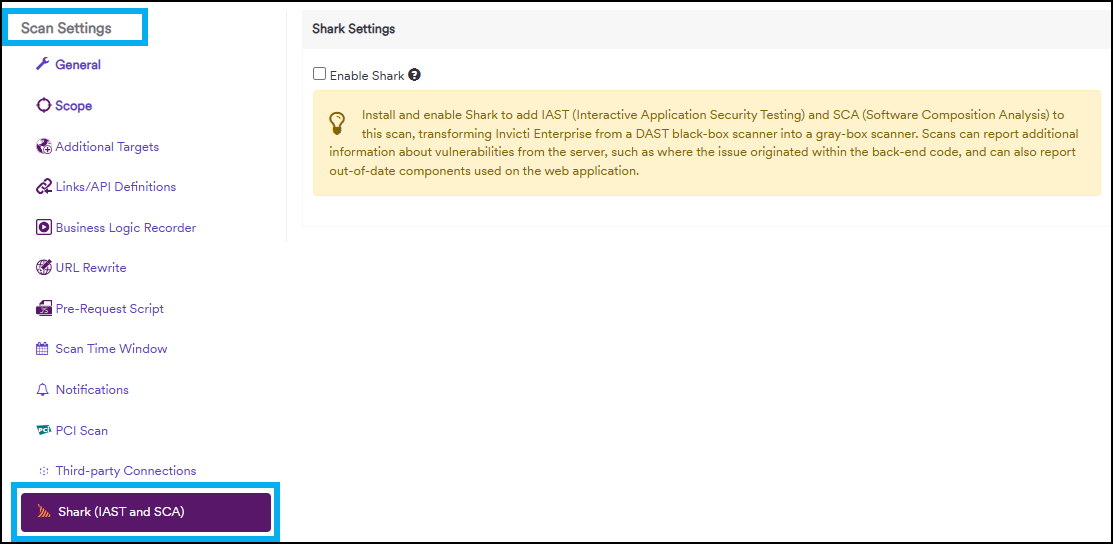
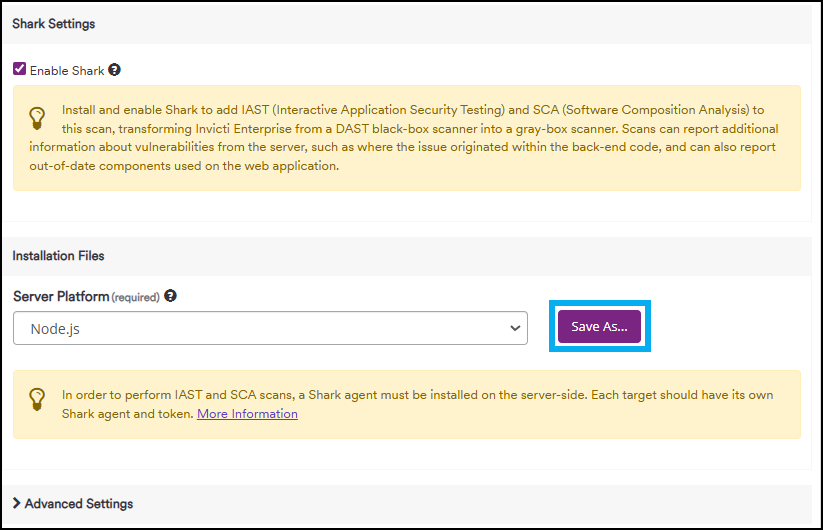
- Select the Enable Shark checkbox.
- In the Server Platform drop-down, specify the platform and click Save As. The options are:
- .Net
- PHP
- JAVA
- Node.js
The download starts immediately.
WARNING:
|

- From the Advanced Settings, you can:
- Select the I have a token I would like to reuse checkbox and enter your token, if you already have one.
- Enter the Bridge URL and Port only if you want to override the default settings.
How to set up a custom Bridge service for Invicti Shark (IAST)
You can either use the bridge service provided by Invicti or install the Invicti IAST Bridge to set up a custom bridge service.
Prerequisites:
- Install the Invicti IAST Bridge.
Follow these steps to set up a custom Bridge for Invicti Shark:
- Press the Windows logo key
- Type Services.
- Ensure that the Invicti IAST Bridge service is running.

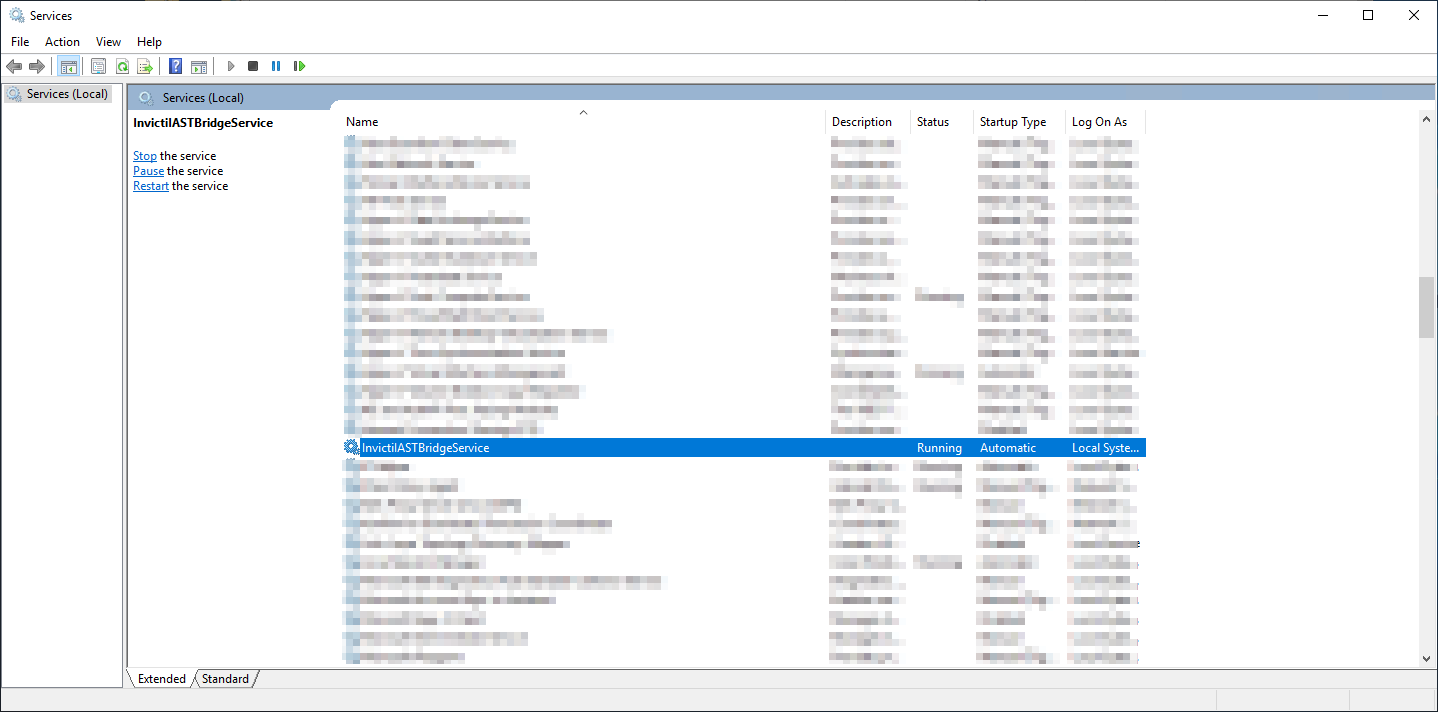
NOTE: By default, the Invicti IAST Bridge runs at the 7880 port using HTTPS. |

- Log in to Invicti Enterprise.
- Select Settings > General from the left-side menu.
- Go to the IAST Bridge section.
- Enter your custom URL to the Default Bridge URL field. (You can enter your custom URL like this: https://52.58.213.161:7880)
- Click Save on the bottom of the page.
IMPORTANT: If you change your bridge URL after installing the Invicti Shark sensor, you must re-install these sensors, so the changes can take effect. |
The process for deploying Invicti Shark on your server is explained in the following documents:
- How to install the PHP Shark
- How to install the .NET Shark (Invicti Enterprise Only)
- How to install the JAVA Shark
- How to install the Node.js Shark
Fields on the Shark (IAST) Page
This section lists and explains the fields available on the Shark (IAST) page.
Installation Files - This section allows you to download the necessary files for use on your server.
Server Platform - Select your server platform (e.g., PHP, Java) to download the appropriate files for your server.
Advanced Settings - Use this section to override the default Shark Token and Bridge URL/Port settings.
- If you need to override the default settings, ensure changes are made before downloading any files for your server.
Shark Token - The Shark Token secures communication between the Invicti scanner and the IAST Shark agent. A unique token is automatically generated for each website’s Shark agent installation.
- If you already have a token, select the I have a token I would like to reuse checkbox and enter your token.
- This field is mandatory.
Bridge URL and Port - The Bridge URL and Port specify the IAST Bridge's address, which relays information from the Shark agent to the Invicti Scanning Engine.
- The default Bridge URL and Port can be configured on the General Settings page. You can override these settings on the Shark configuration page for individual websites.
- You may use the Bridge URL provided by Invicti or configure a custom Bridge. For more information, see Setting a Custom Bridge URL for Invicti Shark (IAST).
- Ensure that the Shark can connect to the specified address and port.
- This field is mandatory for Java, .NET, and Node.js.