Integrating Invicti Enterprise with Jira
Integrating Invicti Enterprise with Jira helps streamline your bug-fixing process and vulnerability management. Any vulnerability that needs fixing can be turned into a Jira ticket and automatically assigned to developers. Other advantages of integration include the ability to monitor the vulnerability-fixing process, reopen and close tickets. When bi-directional integration is configured, it can also be used to verify fixes.
This document explains how to set up an integration between Invicti Enterprise and Jira.
IMPORTANT: If you are using the self-hosted Jira, first make sure Invicti Enterprise On-Demand can communicate with it. |

Integrate Invicti Enterprise with Jira
Prerequisite
- Administrator privileges OR the Add/Edit Integration permission in Invicti Enterprise.
There are five steps to this integration:
- Step 1: Set up the connection with Jira
- Step 2: Configure project details for integration
- Step 3: Create a sample issue
- Step 4: Register a webhook for bi-directional integration (optional)
- Step 5: Configure custom and complex fields (optional)
Step 1: Set up the connection with Jira
- Select Integrations > New Integration from the left-side menu.
- Click on Jira to open a configuration window.
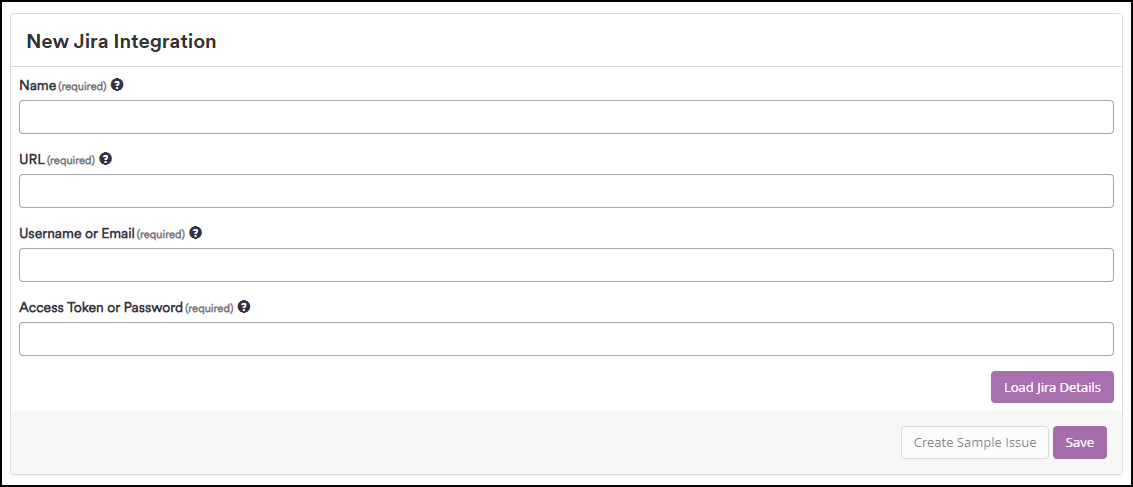
- Complete the connection details:
- Name: the name of the integration that will be shown everywhere else in Invicti Enterprise.
- URL: the Jira URL that must be specified as the domain name.
- Username or Email: if self-hosted, use username; if hosted by Atlassian, use the email address.
- Access Token or Password: the access token (API) or the password of the user. If self-hosted, enter your password; if hosted by Atlassian, enter the API token. The API token can be retrieved from: https://id.atlassian.com/manage/api-tokens.
- Click Load Jira Details.
- If successful, Invicti Enterprise displays your project details to continue with the configuration. Otherwise, an error message is displayed.
Step 2: Configure a Jira project for integration with Invicti
Fill in the Project Configuration fields:
- Choose your project from the Project Key drop-down. Alternatively, start typing your project name or project key to search, then choose your project from the search results.
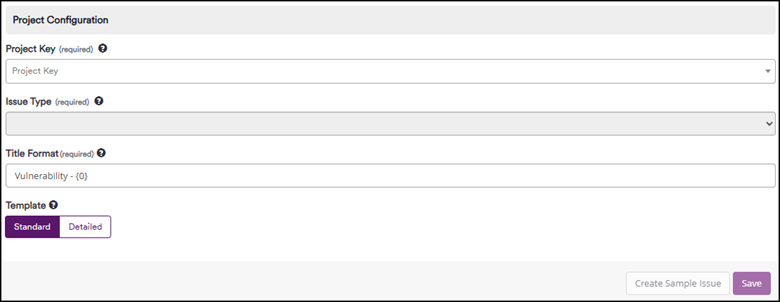
- From the Issue Type drop-down, choose the issue type. Refer to the Jira support documentation: What are work types? for more information.
- Title Format: the string used to create the issue title in Jira. Leave it as it is or type your title format including {0}.
- Template: choose a template type for the issue description:
- Standard
- Detailed displays more information such as Request and Response detail.
- After clicking Save you are taken to the Manage Integrations page where you can see the integration.

- Continue with Step 3 to create a sample issue.
NOTE: You can further configure your integration, for example, by selecting the assigned person or determining the due date. Refer to Step 5: Configure Custom and Complex fields of this article for more information. |

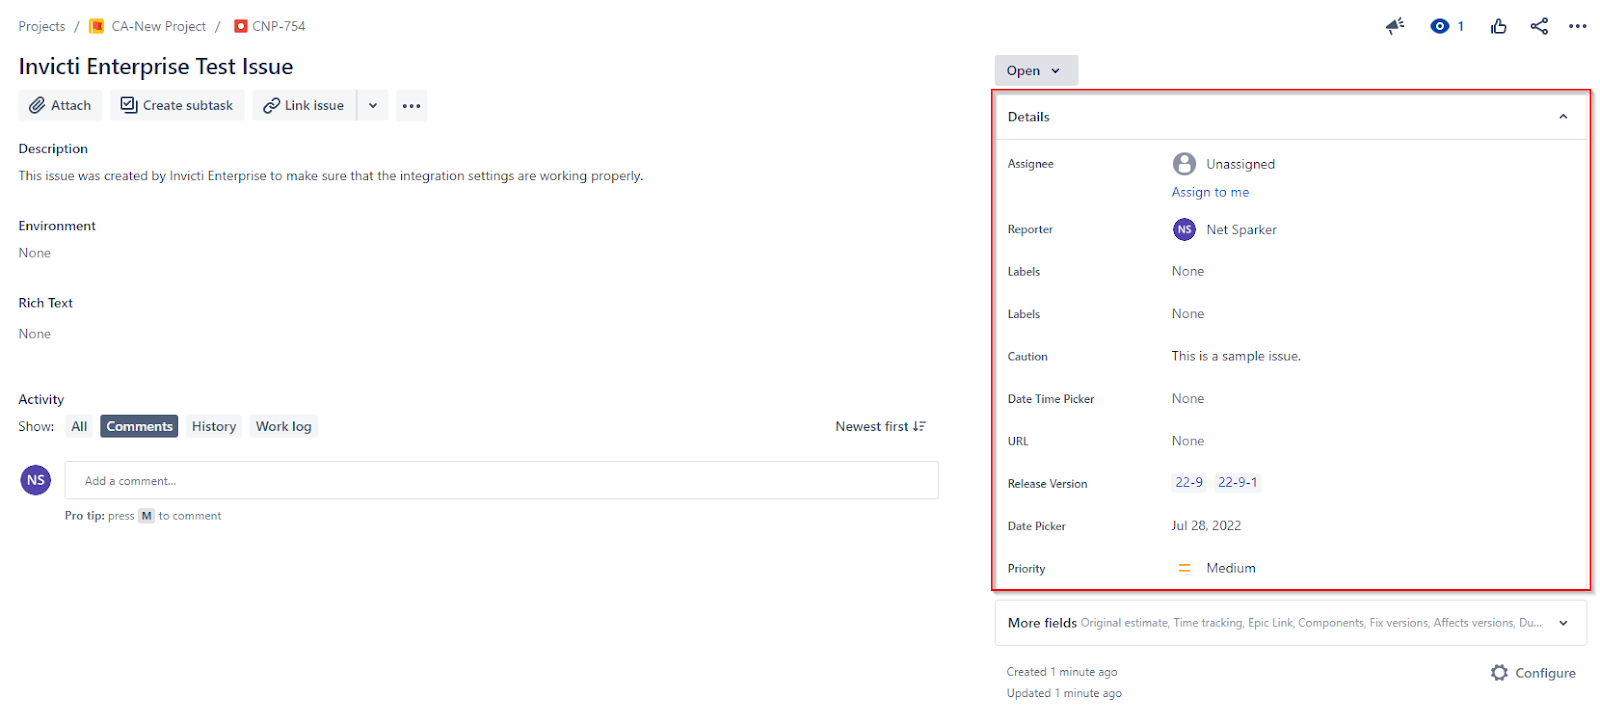
Step 3: Create a sample issue to test the integration
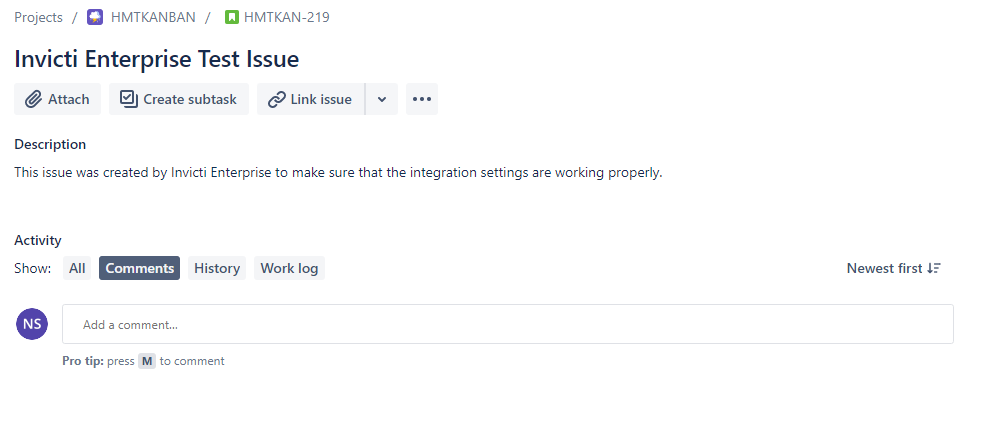
- On the Manage Integrations page, next to the relevant Jira integration, select Edit.
- By clicking Create Sample Issue Invicti Enterprise exports a sample issue to Jira to test the integration. If successful, a similar ticket is opened in Jira:
Step 4: Register a webhook for bi-directional integration
IMPORTANT: We updated the webhook configuration for the bi-directional integration on 23 May 2023. To ensure the integration continues to work, enable the Exclude Body checkbox in the Jira webhook settings. This update is essential for maintaining the full functionality of the integration. |

Invicti Enterprise has out-of-the-box support for automatic issue creation, resolving and reactivating Jira issues according to the scan results. For this purpose it uses user-provided Resolved and Reopen statuses in Jira.
To enhance issue synchronization, Invicti Enterprise also offers webhook support which enables you to detect any status changes in Jira issues. This helps you: streamline issue resolution, cut down on communication overhead, and allow developers to work on vulnerabilities without leaving Jira.
The changes in Jira and Invicit Enterprise statuses are as follows:
- Jira issue’s status changed to Reopen → marked as Revived in Invicti Enterprise.
- Jira issue’s status change to Resolved → marked as Fixed (Unconfirmed) and a retest scan is started in Invicti Enterprise.
For more information, refer to Fix vulnerabilities faster with Invicti Enterprise’s bi-directional Jira integration.
Webhook settings fields
This section explains the Webhook fields on the Update Jira Integration page in Invicti Enterprise.
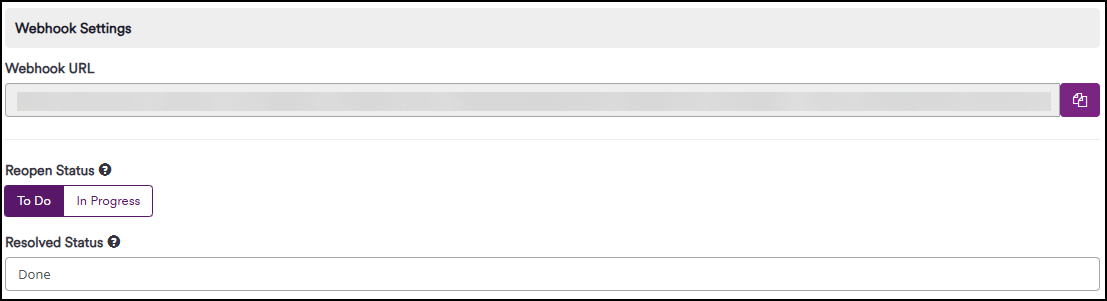
- Webhook URL: the URL you need to enter into Jira to create the bi-directional integration.
- Reopen Status: the status name of the reopened issues or tickets.
- Resolved Status: workflow step name of the resolved issues or tickets. By default, it’s Done.
TIP: In Jira, the Reopen status can only be mapped to two categories: To Do and In Progress. The Resolved status, however, can be mapped to any workflow step from your Jira workflow configuration. To avoid issues, ensure that the workflow steps for the Reopen and Resolved statuses aren’t the same. Other categories added afterwards are referred to as aliases and these values can’t be used for integration with Invicti Enterprise. Pay attention to the category definitions when defining your workflow. |

How to register an Invicti Enterprise Jira integration webhook
To register the webhook integration, follow these steps:
- Select Integrations > Manage Integrations from the left-side menu.
- Next to the relevant Jira integration, select Edit.
- From the Webhook Settings section, select Copy to clipboard to copy the Webhook URL.

- Open Jira in a new browser window.
- From the main menu, go to Settings > System > WebHooks.
- On the WebHooks page, select Create a WebHook.

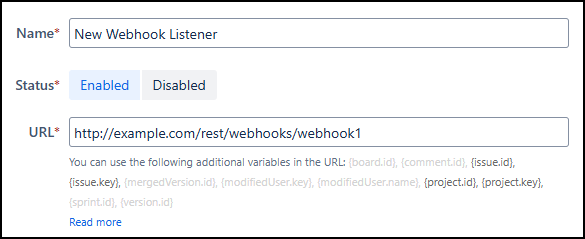
- Enter the Name of your webhook.
- Paste the copied Webhook URL in the URL field.
IMPORTANT: After creating a webhook URL and entering it into Jira, if you modify your project details and save it, this changes the webhook URL. You need to copy the new webhook URL and paste it into Jira. If you don’t do this, your bi-directional integration won’t work. |

- In the Issue-related events section, remove the default value (All issues) and enter the Jira project name for which the webhook configuration is intended.
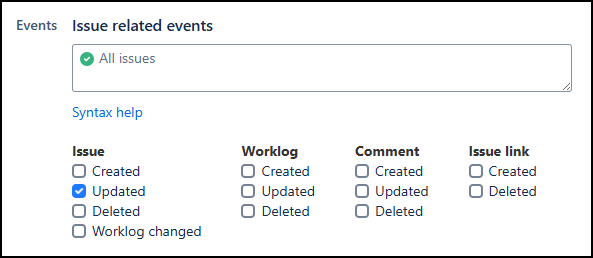
- Enable the Updated checkbox in the Issue column.
- Scroll down to enable the Exclude body checkbox. This step is required for the webhook to work.

- Click Create.
Step 5: Configure Custom and Complex fields (optional)
You can further customize your Jira integration using Custom and Complex fields. For example, you can choose the assignee responsible for issues identified by Invicti Enterprise. Or, you can choose the priority level for the issue. You can also add or delete fields as needed.
Jira field mappings
The following fields appear by default in the dropdown. Depending on your project and issue type, additional fields may be available.
- Assigned to: the user to whom the issue is assigned by default.
- Reporter: the user who reported the issue.
- Labels: the issue labels.
- Components: the components that you need to create in Jira. You can select more than one component. Refer to the Jira support site for more information.
- Security Level: the issue’s security level. You need to define this level in Jira, so you can control which user or group of users can view an issue. If there is no level defined, "No research found" is displayed. Refer to Jira’s Configuring issue-level security document for more information.
- Due Days: the number of days from the date the issue was created to the date it’s due.
- Priority: the priority of the issue. This is mapped between Invicti Enterprise and Jira. For example, Invicti Enterprise’s high priority issue is mapped as the highest priority in Jira. If you don't map any priority level, all issues will be marked as "medium". If you mapped only one level, for example, the highest, the rest of the issues will be sent as the medium.
- Epic Link: an epic key from Jira.
- Epic Name: the name of the epic you created, visible only if you select the issue type as Epic. When you send any issue, including sample issue creation, Invicti Enterprise creates the epic name in Jira. You can’t select an epic name and epic link for the same integration.
How to add a new custom field
- Select + New Jira Field from the Jira Field Mappings section.
- Select the Field Name from the drop-down. For this example, we selected Priority.
- Select Critical from the Invicti Security drop-down.
- Select Highest from the Jira Value drop-down.
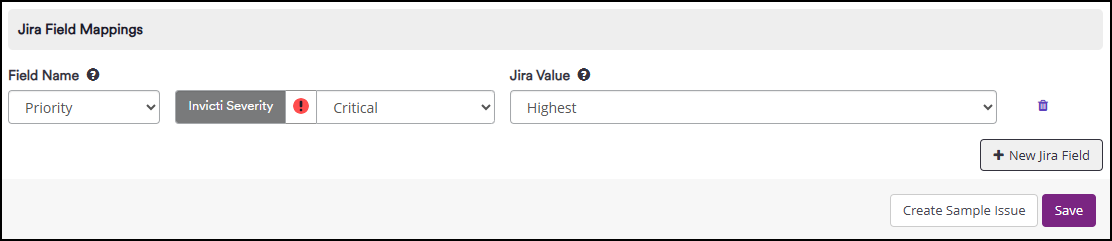
- Click Save.
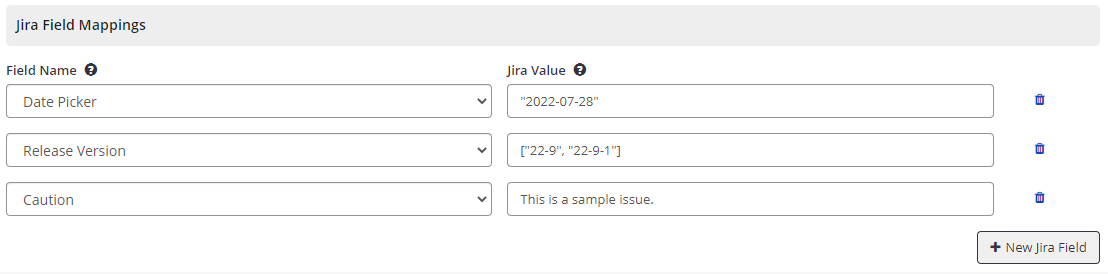
How to configure complex fields
Your project can include complex fields, such as date pickers, in addition to custom fields. To map complex fields, you need to enter them using double quotes or square brackets.
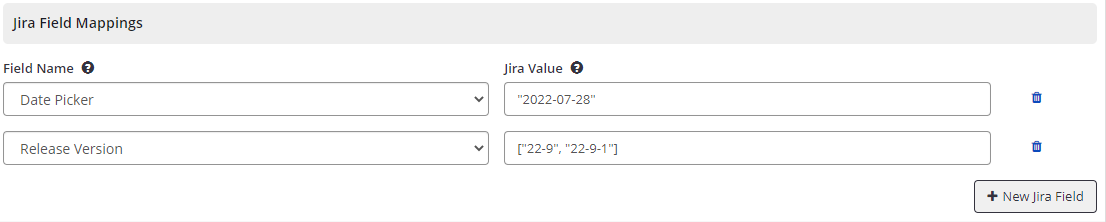
- Select + New Jira Field from the Jira Field Mappings section.
- Select the Field Name from the dropdown. For example, Date Picker.
- Enter the Jira Value. For example, "2022-07-28".

- Select + New Jira Field from the Jira Field Mappings section.
- Select the Field Name from the dropdown. For example, Release Version.
- Enter the Jira Value. For example, ["22-9", "22-9-1"].
- Select + New Jira Field from the Jira Field Mappings section.
- Select the Field Name from the dropdown. For example, Caution.
- Enter the Jira Value. For example, This is a sample issue.
- Select Create Sample Issue. If successful, Invicti Enterprise displays a success message and a link to the ticket.
- You can view the issue details you have sent to Jira in the following way:
Manage Jira integration
How to edit it
- Select Integrations > Manage Integrations from the left-side menu.
- Next to the relevant Jira integration, select Edit.
- Make the necessary changes, and click Save.
How to delete it
- Select Integrations > Manage Integrations from the left-side menu.
- Next to the relevant Jira integration, select Delete.
- From the Delete Integration pop-up, click Delete.
How to clone it
TIP: You can clone your integration to create as many Jira integrations as you need. However, due to security precautions, access tokens or passwords can’t be cloned. |

- Select Integrations > Manage Integrations from the left-side menu.
- Next to the relevant Jira integration, select Clone.
- Make the necessary changes, then click Save.
Export issues to Jira
There are multiple ways to send issues from Invicti Enterprise to Jira:
Automatic issue submission
After integration, you can configure Invicti Enterprise to automatically send issues to Jira after scanning has been completed. Refer to the Configuring Notifications document for more information.
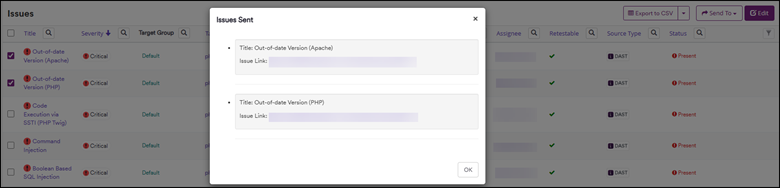
Send issues from the Issues page
- Select Issues > All Issues from the left-side menu.
- On the Issues page, select one or more issues you want to send.
- Click Send To > Jira.
- On successful export, a popup is displayed, with a link to the issue you have sent to Jira.
Send issues from the Recent scans page
- Select Scans > Recent scans from the left-side menu.
- Next to the relevant scan, select Report.
- Scroll down to the Technical Report section.
- From the list of detected issues, select an issue and display its details.
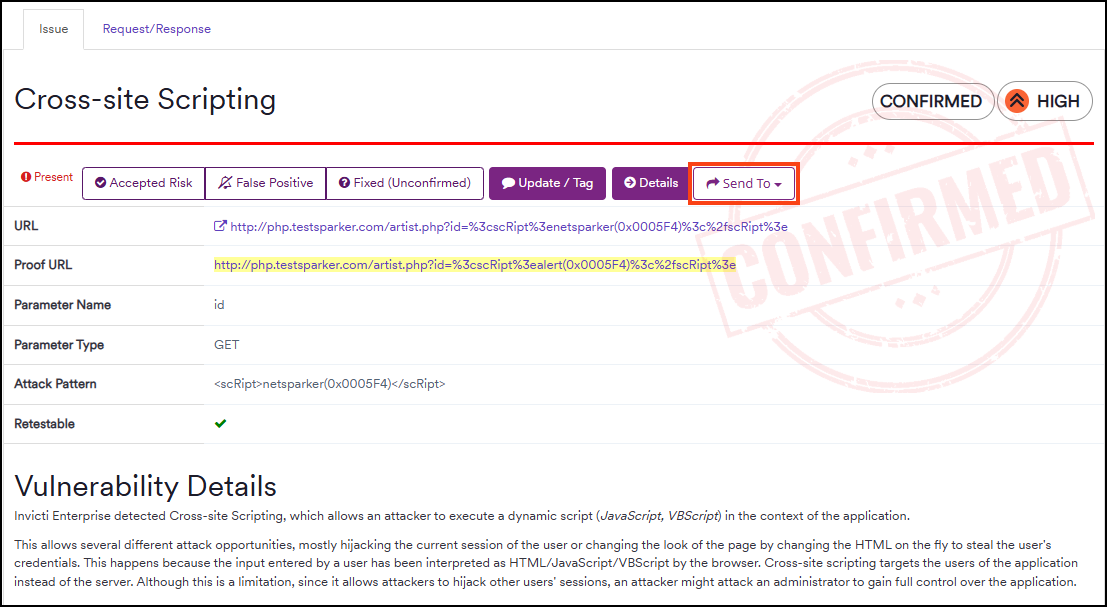
- Select Send To > Jira.
To view the issues, check the Open issues page in Jira.

TIP: If this vulnerability has already been submitted to Jira, it will be accessible there. You can’t submit the same issue twice. |

How to avoid testing loops
If you do not want Accepted Risk or False Positive issues to be reopened and retested, make sure the Jira case is not closed using any of the resolved workflow steps used for the Resolved status. If you have the bi-directional webhook configured, you can enable prevention of reopening them in Jira. For more information, refer to Prevent reopening issues in Jira section.
Alternatively, you can create a dedicated workflow (name suggestion would be ‘false positive’ or ‘accepted risk’) step in Jira for false positives that does not overlap with the workflow steps used for the Resolved status in Invicti.
Using the same workflow step for both false positives and resolved issues can lead to a testing loop. The vulnerability would be manually marked as a false positive – Fixed (Unconfirmed) – then retested in the next scan. The vulnerability reappears, gets marked as a false positive again, and is closed manually. The Jira case is reopened, repeating the cycle.
Prevent reopening issues in Jira
When the option “Do not re-open issues marked as False Positive or Accepted Risk” is enabled and the vulnerabilities previously marked as False Positive or Accepted Risk are revived during scans, the system doesn’t reopen the issue in the integrated Issue Tracker. This option is disabled by default.
How to enable the option
- Select Integrations > Manage Integrations from the left-side menu.
- Click Edit next to your Jira integration.
- Navigate to Webhook Settings.
- Under the Webhook URL, enable the Do not re-open issues marked as False Positive or Accepted Risk checkbox.
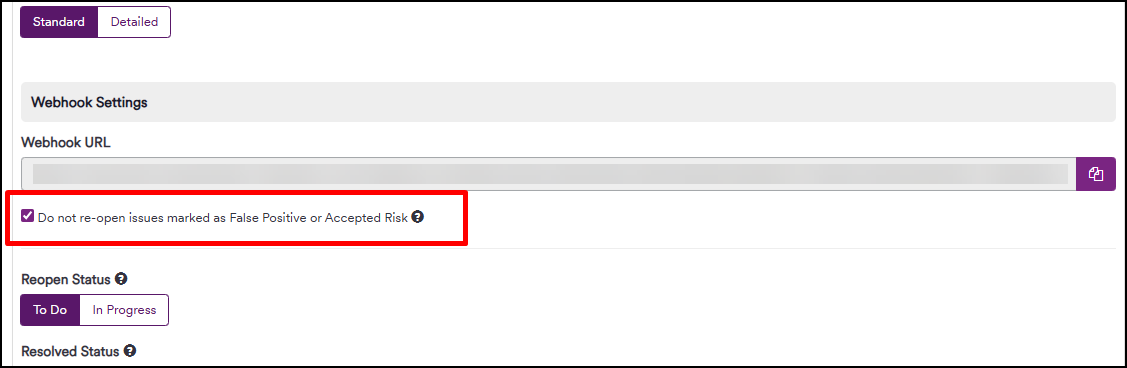
- Click Save to close the settings.
NOTE: When reviewing the history of detected issues, a message will appear if the option is enabled: “The issue will not be reopened in the Issue Tracking System because it has been marked as either a False Positive or an Accepted Risk.” |
